
INTRODUCTION
Are you ready to make your photos look super cool and professional? Imagine your pictures having that extra sparkle, making everything in them truly pop! We're going to learn a secret trick today: how to add Realistic Drop Shadows to your images. This isn't just about making things look good; it's about making them look real, like they're right there in front of you. If you've ever wondered how some images just seem to jump off the screen, chances are they've got some fantastic shadow work going on.
For four years, our team has been helping people just like you make their photos amazing. We do all sorts of photo editing, from clipping path to photo retouching and photo masking. We know a lot about making images perfect, and today, we're sharing one of our favorite techniques. Adding realistic shadow effects is a game-changer. It makes your flat images look three-dimensional, giving them depth and a professional touch. So, let's dive in and learn how to master the art of the image shadow!
“ADDING REALISTIC DROP SHADOWS TRANSFORMS FLAT DESIGNS INTO VIVID, TANGIBLE ELEMENTS—BREATHING DEPTH AND LIFE INTO EVERY OBJECT.”
— Alex Morgan, Graphic Designer & Visual Artist
Why Realistic Drop Shadows Are Super Important
Think about real life. Everything has a shadow, right? When sunlight kisses the tree, its shadow stretches gently beneath. Notice how your hand casts a shadow when you hold it up. Shadows provide crucial information, helping our brains understand an object's distance, size, and the light's origin.
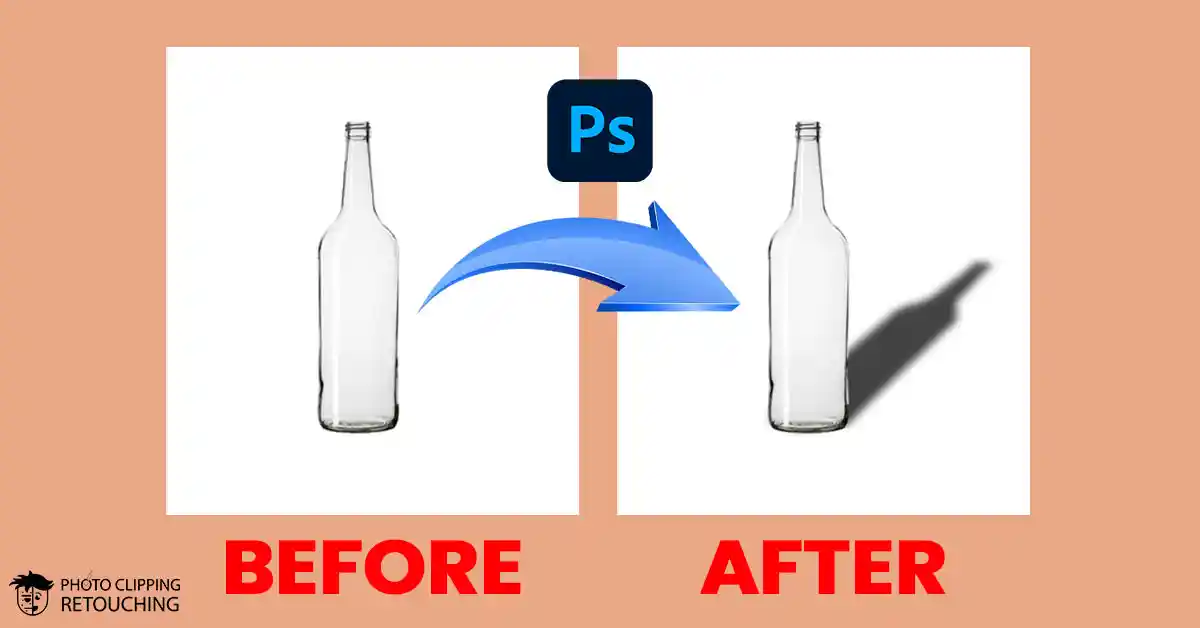
When we look at pictures, our brains still expect to see shadows. If something in a picture doesn't have a shadow, it can look fake, like it's just floating in space. That's why realistic drop shadows are so important for your images. They make flat objects look like they have weight and are truly resting on a surface. This instantly makes your product photos, portraits, or any image with a clear subject look much more believable and professional.
Adding the right image shadow can make a huge difference in how people see your photos. This makes items distinct and draws the eye of the observer. Without a good shadow, your object might blend into the background, looking flat and uninteresting. But with a well-placed, natural-looking shadow, your object suddenly has a presence. It looks grounded and important.
Have you ever seen a product photo online where the item looks like it's just been cut out and pasted onto a background? It lacks realism. That's because it's missing a crucial element: a shadow! Good shadow design techniques are essential for e-commerce, graphic design, and even personal photos you want to share. They tell a story about the object's relationship with its environment.
Getting Started with Realistic Shadow Effects
Now that we know why shadows are so important, let's talk about how to create those fantastic realistic shadow effects. It's not just about slapping a dark blur under your object. There's actually a bit more to consider. The best shadows mimic real-world physics.
One of the biggest mistakes people make when adding shadows is making them too dark or too blurry. A real shadow isn't just a blob. It has a subtle gradient, getting softer as it moves away from the object. It also takes on the color of the surface it's falling on, to some extent. Mastering these nuances is key to creating a truly realistic drop shadow.
We're going to focus on techniques that make your shadows look natural and believable. This involves understanding light sources, the distance of the object from the surface, and the texture of the surface itself. Don't worry, it sounds complicated, but we'll break it down into easy steps. You'll be a shadow pro in no time!
Another important aspect is consistency. If you have multiple objects in your image, their shadows should all look like they're being cast by the same light source. This means the direction, softness, and intensity of the shadows should be similar. This attention to detail is what separates a good image from a great one. It truly helps to improve object depth and overall visual harmony.
Essential Tools for Adding Shadows to Images
When it comes to adding shadows to images, especially realistic drop shadows, software like Adobe Photoshop is your best friend. It offers a wide range of tools and features that allow for precise control over your shadows. Although many photo editing software options exist, Photoshop continues to set the industry standard.
- Layer Styles: Photoshop's "Drop Shadow" layer style is a good starting point. It allows you to quickly add a basic shadow, and then you can tweak its settings like opacity, distance, spread, and size.
- Layer Masks: These are crucial for refining your shadows. Layer masks let you non-destructively hide or reveal parts of a layer, allowing you to control where your shadow appears and how strong it is.
- Blur Filters: Gaussian Blur is your go-to for softening shadows. Remember, real shadows aren't usually razor-sharp.
- Transform Tools: Tools like Free Transform and Distort can help you manipulate the shape and perspective of your shadow to match the light source.
If you don't have Photoshop, many online photo editors also offer basic shadow tools. However, for truly realistic shadow effects and the fine-tuning that makes them look professional, Photoshop is highly recommended. It gives you the power to create custom shadows that perfectly fit your image and vision.
Understanding Light and Shadow Design Techniques
Before you even start clicking buttons in Photoshop, it's super important to understand how light works. This is the foundation of all good shadow design techniques. Think about where the light is coming from in your original photo. Is it from the top? The side? From the front? The back?
The direction of your light source dictates the direction of your shadow. If the light is coming from the top-left, your shadow will fall to the bottom-right. It's like your own shadow on a sunny day – it always falls opposite the sun.
Also, think about the type of light. Is it a harsh, direct light (like a spotlight), or a soft, diffused light (like a cloudy day)? Harsh light creates sharp, well-defined shadows. Soft light creates softer, more gradual shadows. Matching your created shadow to the original light in your image is what makes it look genuinely real. This is critical for generating realistic drop shadows.
Consider how far the object is from the surface onto which its shadow is cast. An object casts a sharper, more defined shadow when it’s close to the surface. If it's further away, the shadow will be softer and more spread out. This subtle detail is a key aspect of improving object depth and making your shadows believable.
Step-by-Step Guide How to Create Realistic Drop Shadows
Alright, let's get our hands dirty and learn how to create awesome realistic drop shadows! This guide will assume you're using Adobe Photoshop, as it gives you the most control. We'll include sections for adding screenshots and a tutorial video, but for now, let's walk through the steps.
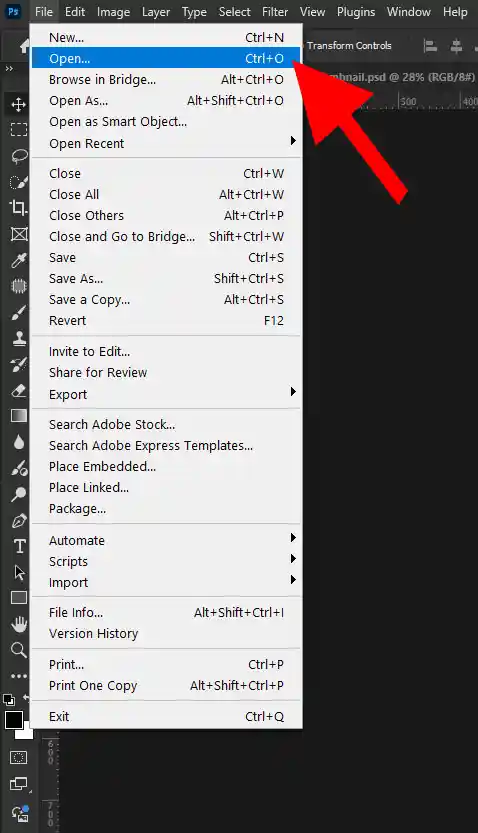
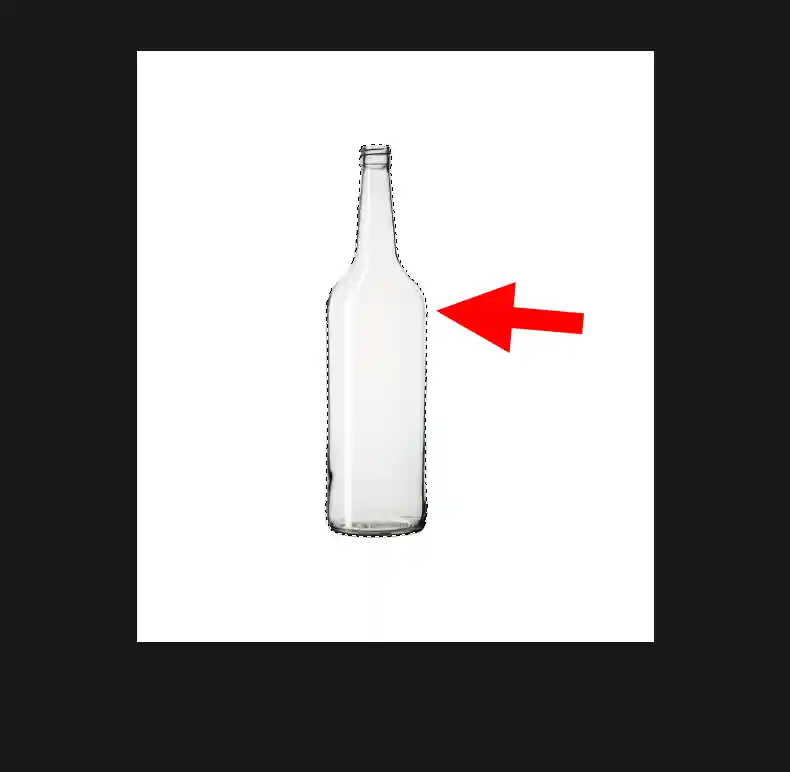
Step 1: Opening The Image
First, go to the 'File' tab. From there, choose the 'Open' option.
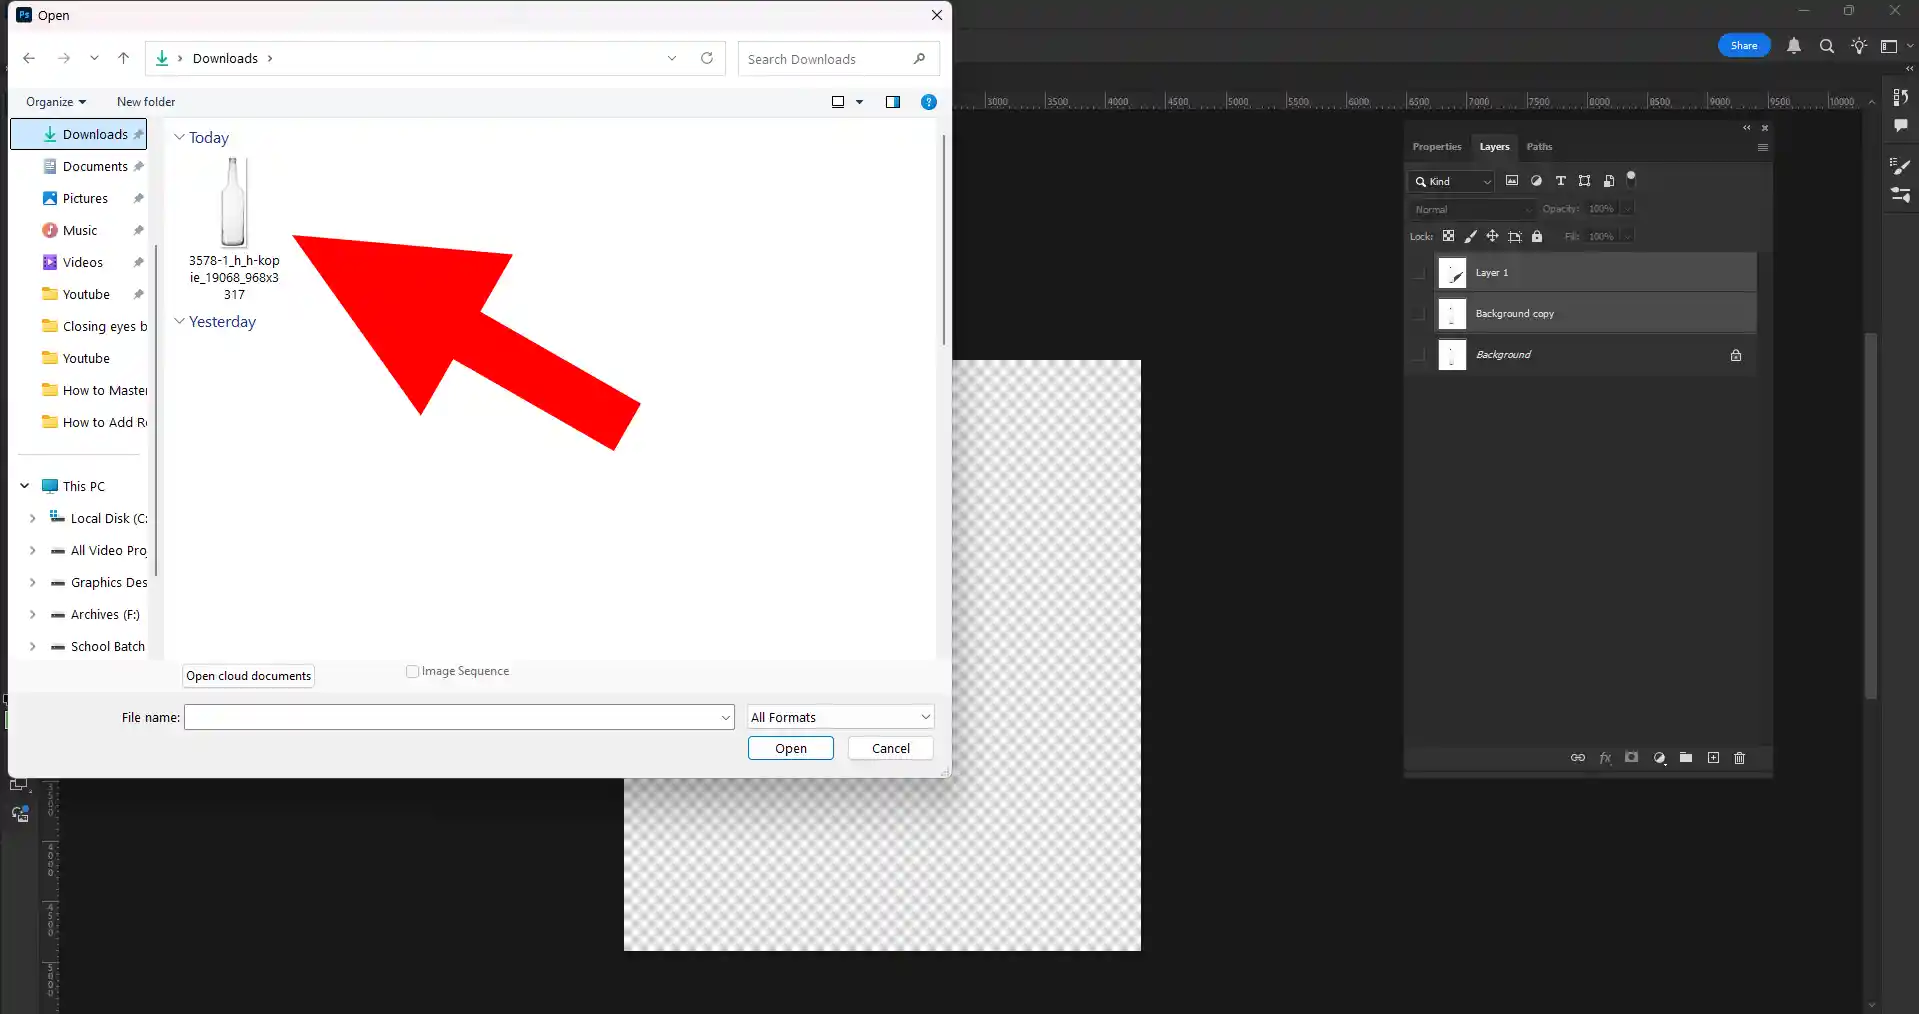
Step 2: Selecting Image
Select the image and click on open option.
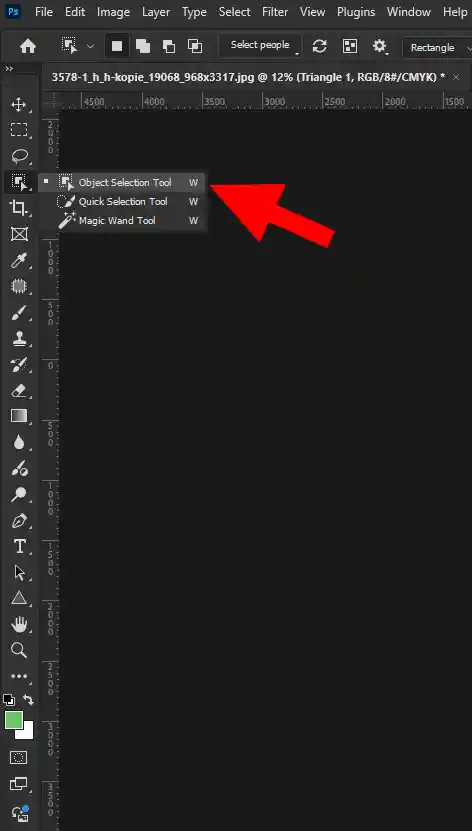
Step 3: Selecting Tool
Go to your left side tool bar and select quick selection tool.
Step 4: Selecting The Object
Click on the object for selecting the subject.
Step 5: Taking Feather
Press Shift + F6 then take 0.5 feather and press ok.

Step 6: Making duplicate Layer
Press Ctrl + J simultaneously to duplicate the layer.
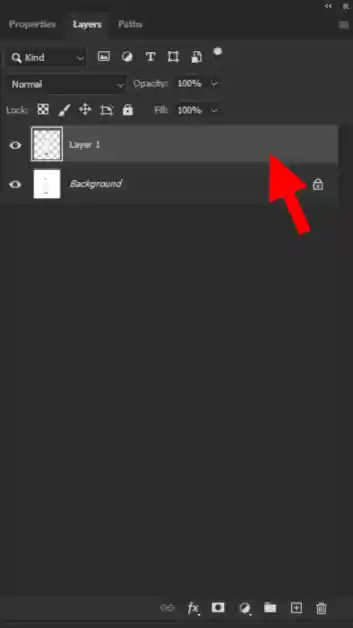
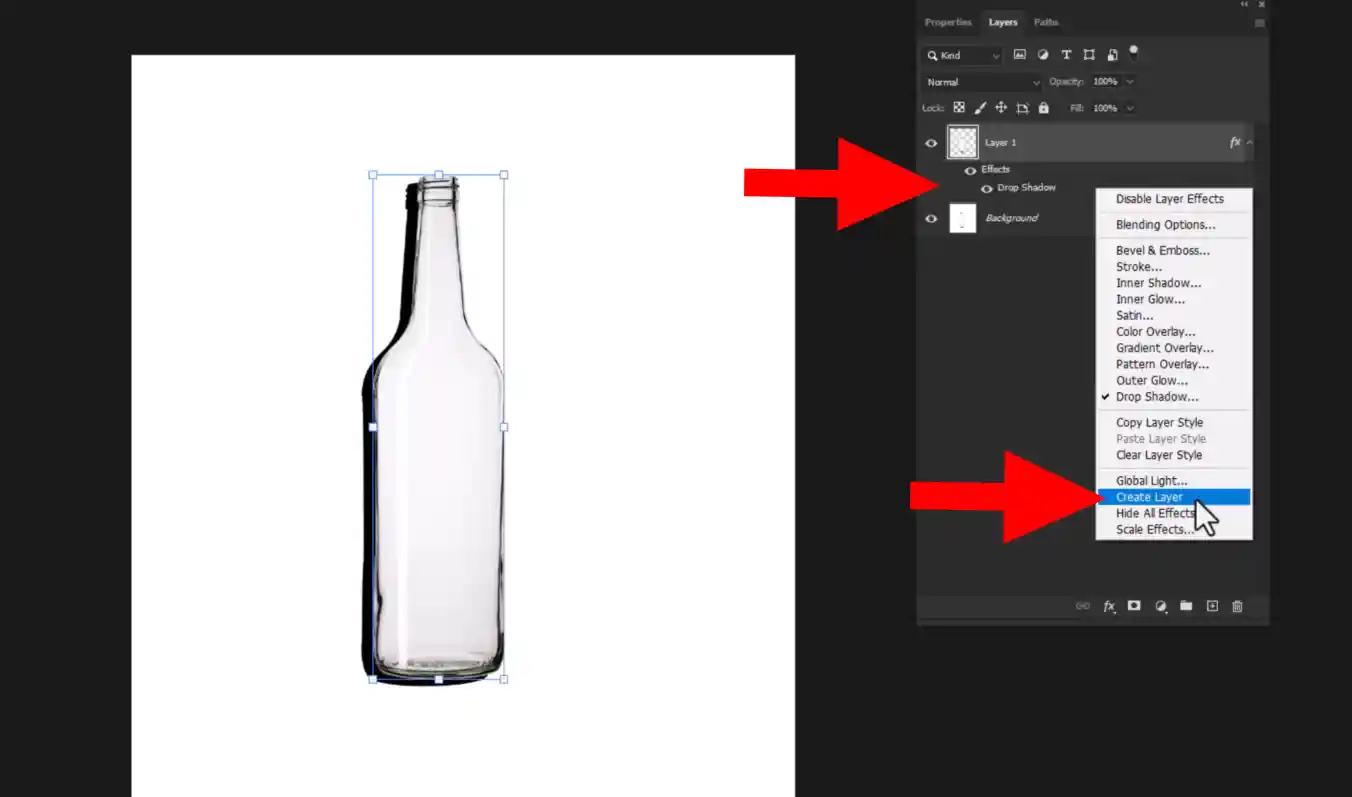
Step 7: Going To Blending Option
Now Click right button on the layer and select blending option.
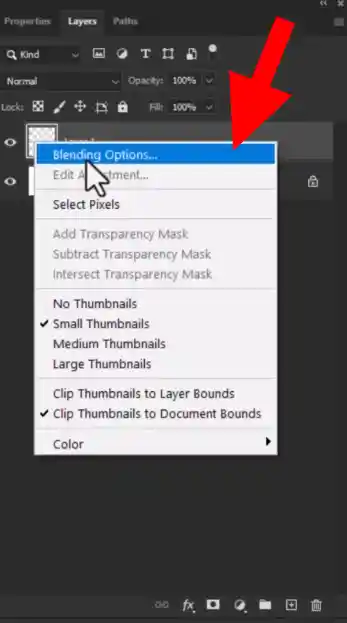
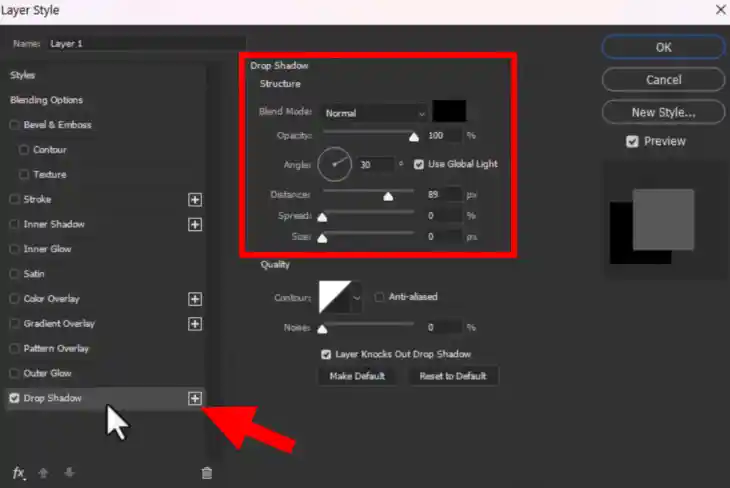
Step 8: Creating Shadow
Click on drop shadow option then select all the amount are given in right side and press ok.
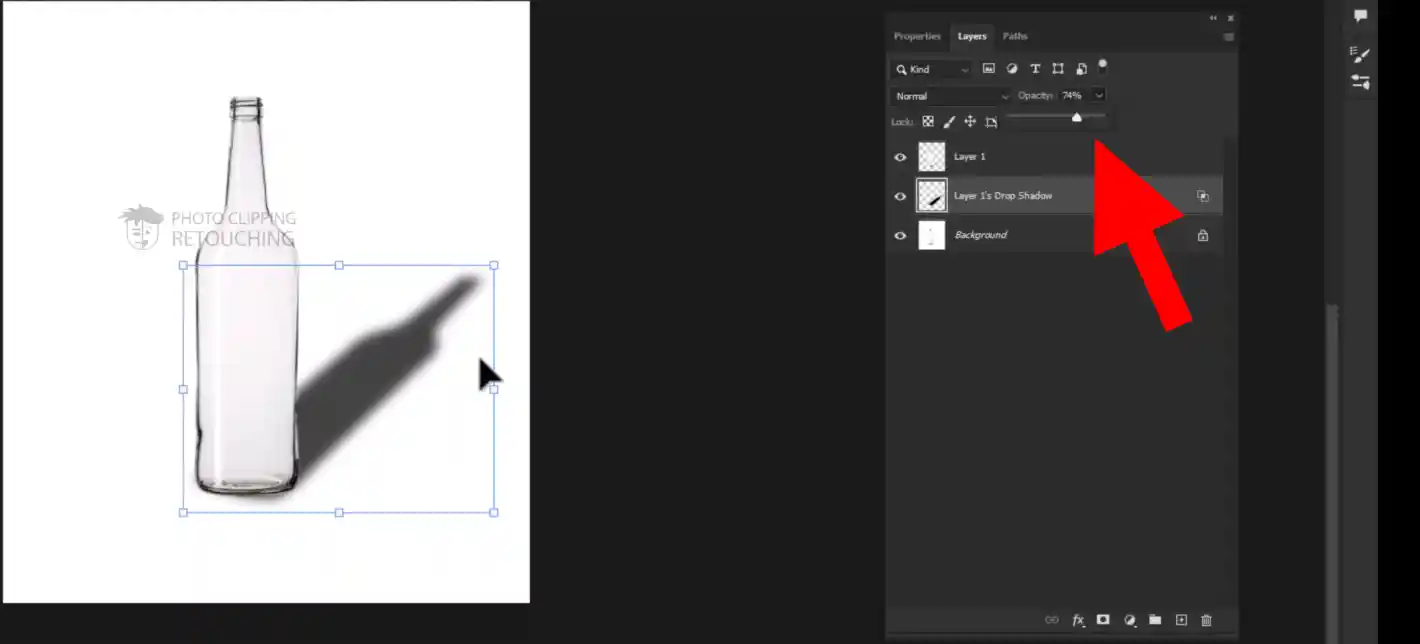
Step 9: Separating The Shadow Layer
1.Click right button on the drop shadow option.
2.Now click create layer option and press ok.
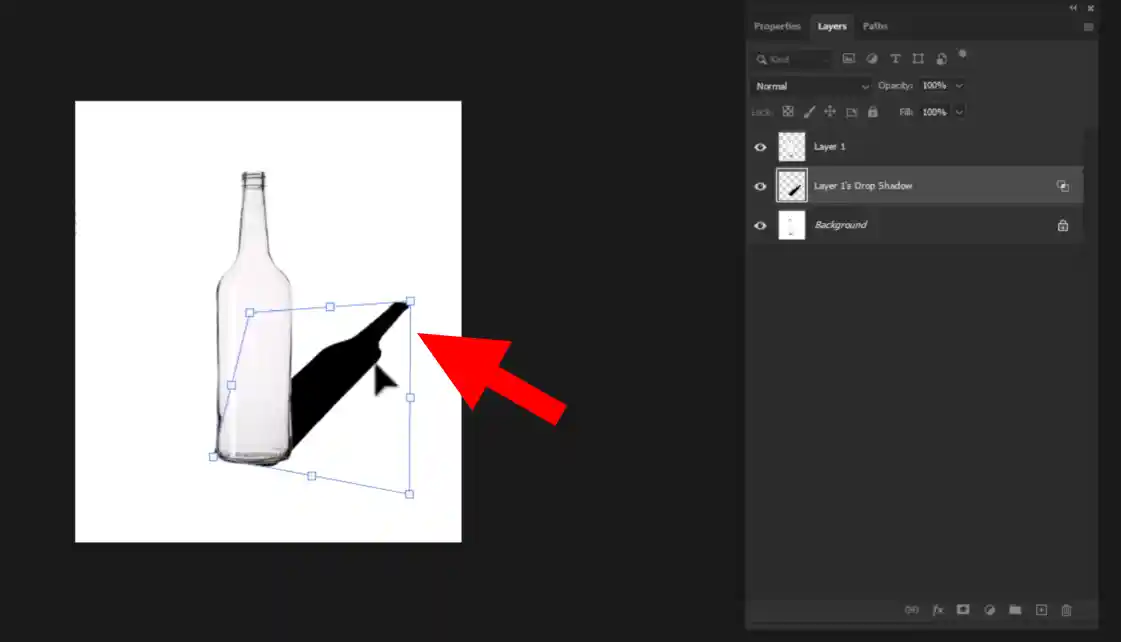
Step 10: Transforming The Object
1.Select the 2nd layer.
2.Then Press Ctrl + T for transforming the object.
Step 11: Dragging The Object
Hold Ctrl and drag the shadow you wanted.
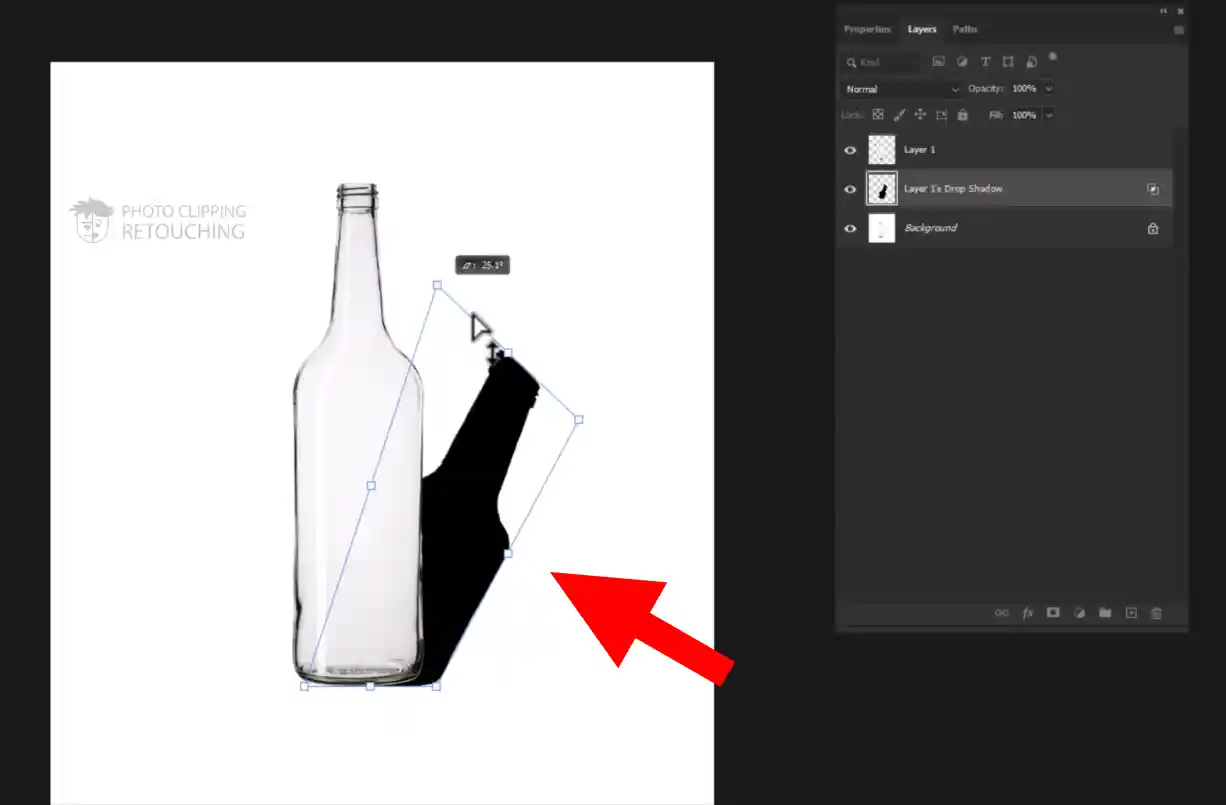
Step 12: Shaping The Shadow
By dragging you have to place the shadow in the perfect place.(It may take sometime to do it.)
Step 13: Selecting Gaussian Blur Option
From the top toolbar, select Filter, navigate to Blur, and pick Gaussian Blur from the options.
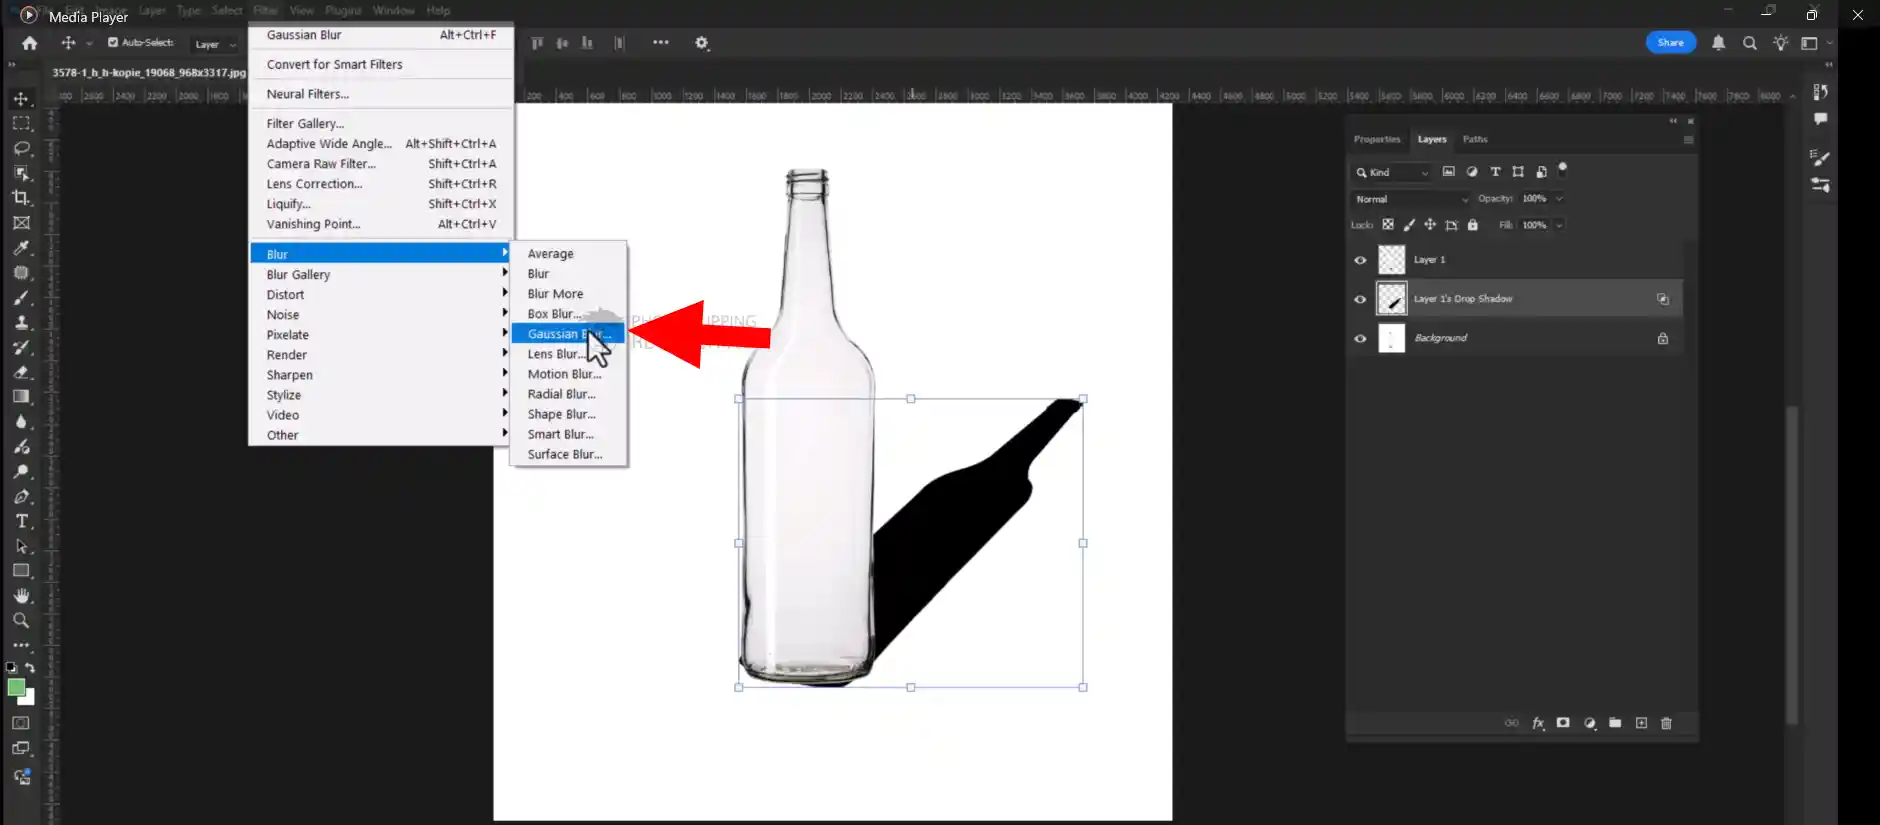
Step 14: Selecting Radius Amount
Set the radius to the value that looks best, then confirm by clicking OK.

Step 15: Decreasing The Opacity
Go to the opacity option and decrease the opacity perfectly.
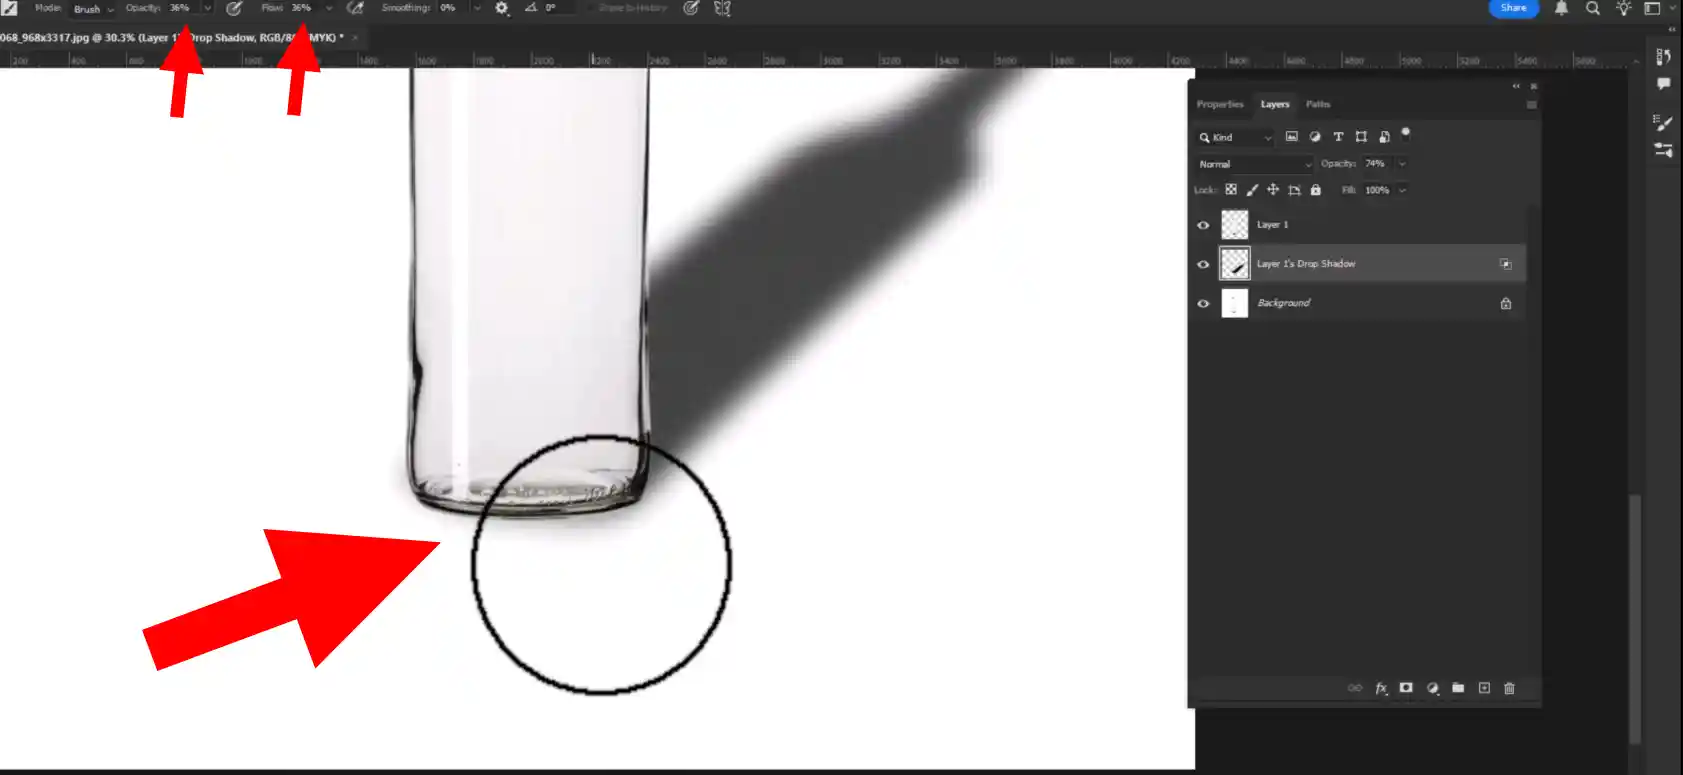
Step 16: Erasing The unwanted Area
- Press (E) for getting eraser tool.
- Make sure to decreasing opacity and flow.
- Now erase the unwanted area perfectly.
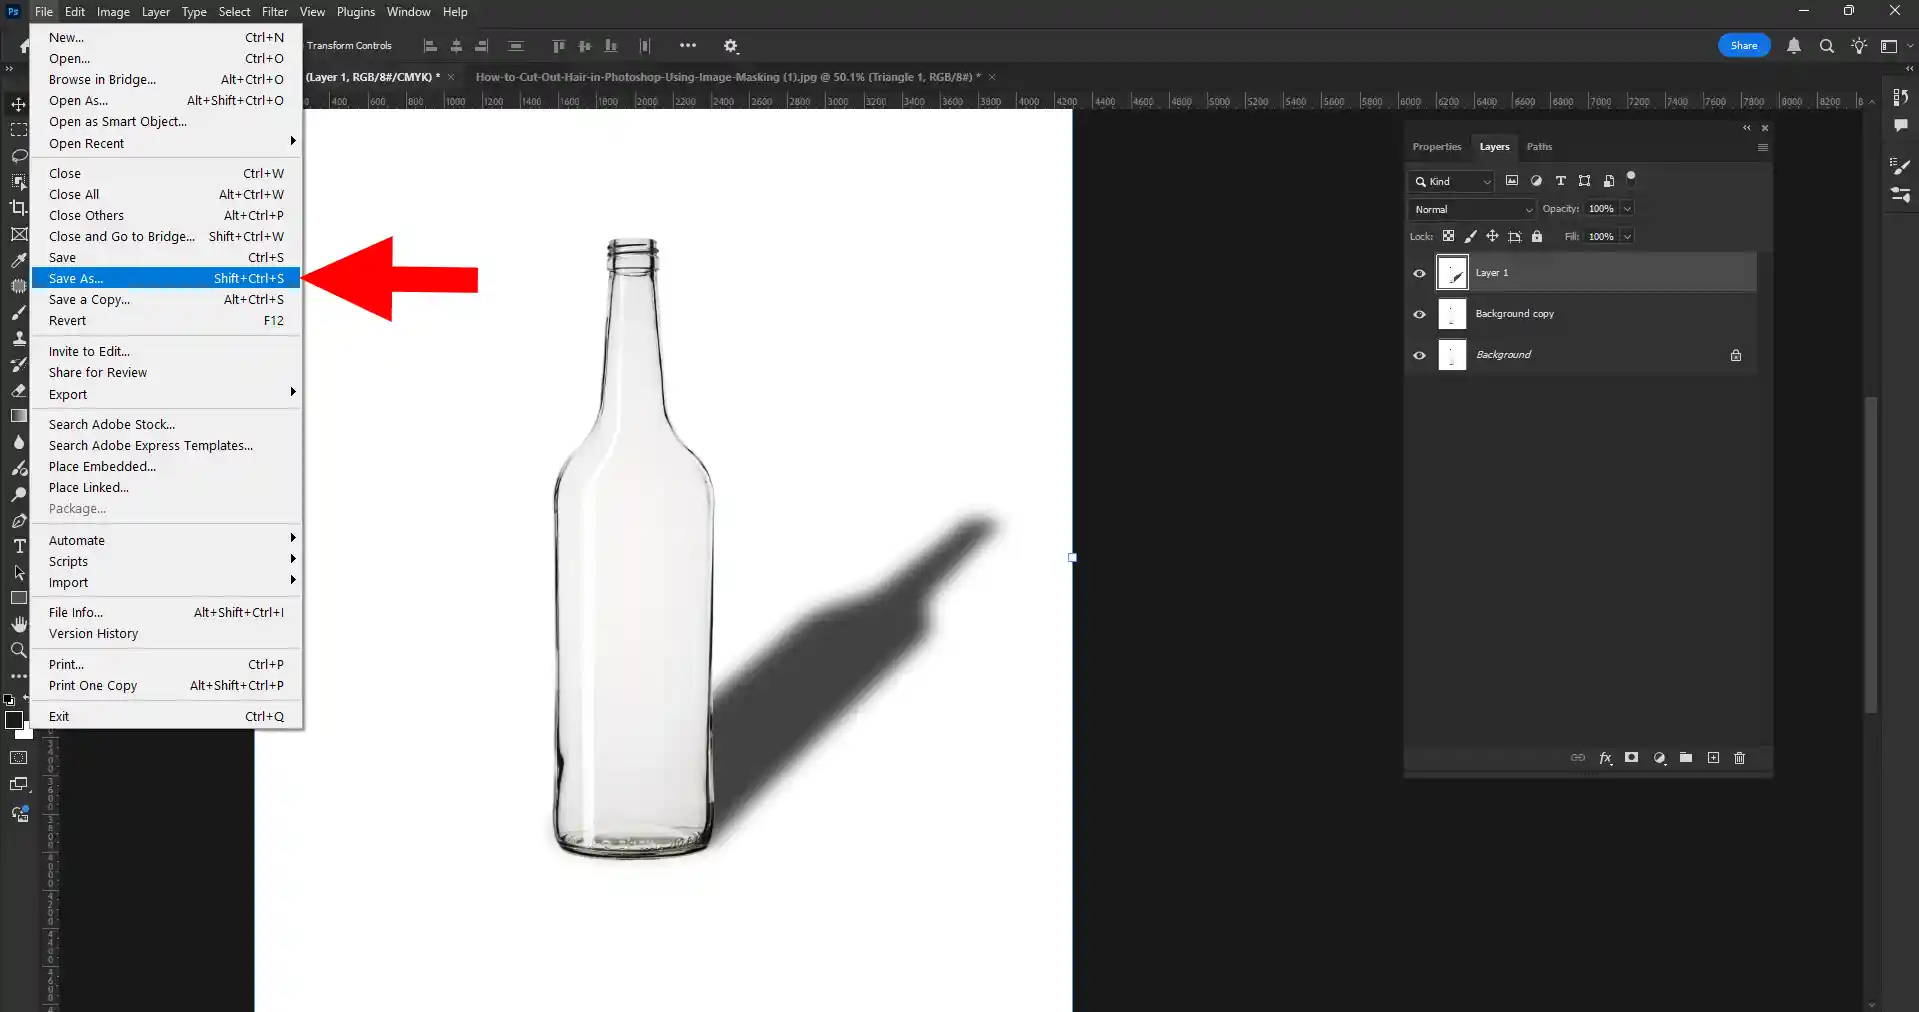
Step 17: Saving The Image
1.Go to your right side and clicke on file option.
2.Then click on save as option.
3.Now save it as you wanted.You can save it JPGE,PSD formate.
Finally your work is done.
Photoshop Drop Shadow Tips and Tricks for Professional Results
Now that you know the basic steps, let's go over some advanced Photoshop drop shadow tips to really elevate your game and help you make objects stand out.
- Consider the Surface: Is your object sitting on a rough concrete floor, a smooth wooden table, or a reflective glass surface? The shadow should reflect this. On a reflective surface, you might even need a subtle reflection in addition to the shadow.
- Color of the Shadow: While often black, a truly realistic drop shadow isn't always pure black. It can pick up a subtle hint of the color of the surface it's falling on, or even a subtle tint from the ambient light. Try creating a new layer above your shadow, filling it with a subtle color sampled from your background, and setting its blend mode to "Color" or "Soft Light" with a low opacity.
- Light Direction Consistency: We mentioned this earlier, but it's worth repeating. All shadows in your image must look like they are cast by the same light source. This means their direction and intensity should be consistent.
- Feathering Edges of the Object (Sometimes): If your object has very sharp, hard edges, sometimes a very subtle feathering (a tiny amount of blur) on the object's edges themselves can help it blend better with a realistic shadow, especially if the original photo wasn't perfectly sharp.
- Experiment with Noise: Sometimes, adding a tiny bit of "noise" (Filter > Noise > Add Noise) to your shadow layer can make it look more organic and less digitally perfect, especially if the background has some texture.
- Practice Makes Perfect: The more you practice adding shadows to images, the better you'll become at recognizing what looks natural and what doesn't. Feel free to try out various settings and methods without hesitation.
Making Objects Stand Out with Perfect Shadows
The main purpose of adding realistic drop shadows is to help objects pop in your visuals. Whether you're showcasing products for an e-commerce store, enhancing a portrait, or creating stunning graphic designs, the right shadow can make all the difference.
Think about how a product photo looks without a shadow versus with a beautifully rendered one. The product with the shadow immediately looks more real, more desirable, and more grounded. It gives the impression that you could physically reach out and feel it. This is the power of good image shadow work.
Proper shadow design techniques don't just add depth; they add a sense of professionalism and attention to detail. It shows that you've gone the extra mile to present your visuals in the best possible light (pun intended!).
Video Guide How to Add Realistic Drop Shadows
Watch our detailed video tutorial to see all these techniques in action! We walk you through every step, offering real-time tips and explanations to help you master realistic shadow effects. This video is perfect for visual learners who want to see the Photoshop drop shadow tips applied live.
CONCLUSION
Morbi sed imperdiet in ipsum, adipiscing elit dui lectus. Tellus id scelerisque est ultricies ultricies. Duis est sit sed leo nisl, blandit elit sagittis. Quisque tristique consequat quam sed. Nisl at scelerisque amet nulla purus habitasse.
Nunc sed faucibus bibendum feugiat sed interdum. Ipsum egestas condimentum mi massa. In tincidunt pharetra consectetur sed duis facilisis metus. Etiam egestas in nec sed et. Quis lobortis at sit dictum eget nibh tortor commodo cursus.
Odio felis sagittis, morbi feugiat tortor vitae feugiat fusce aliquet. Nam elementum urna nisi aliquet erat dolor enim. Ornare id morbi eget ipsum. Aliquam senectus neque ut id eget consectetur dictum. Donec posuere pharetra odio consequat scelerisque et, nunc tortor.
