
INTRODUCTION
Hello from the expert team at PhotoClippingRetouching.com! As a team of professional retouchers, we see thousands of images every month from photographers and brands all over the world. We know that learning a technique like frequency separation in Photoshop can be the one thing that separates a good portrait from a truly stunning one. Have you ever spent hours editing a photo, only for the skin to look flat, fake, or like plastic? You carefully remove a few blemishes, and suddenly, all the beautiful, natural skin texture vanishes. It's a common and frustrating problem that almost every new photo editor encounters.
What if we told you there's a specific technique that professionals use to avoid this? A powerful method that allows you to smooth out skin color and remove blemishes without destroying the delicate texture that makes a person look real and vibrant. This technique is Frequency Separation.
It might sound complex, but we promise to make it simple for you. We will walk you through each step of this process. This isn’t just another basic tutorial. This is the exact, in-depth workflow our international team of editors uses every day to deliver flawless images to our clients.
Not only will you know each step by the end of this guide, but you will also understand the process. You'll be ready to master frequency separation and give your portraits that truly high-end, professional finish.
What You Will Learn:
- What Frequency Separation really is (explained simply with an analogy).
- A detailed, step-by-step guide to set it up perfectly in Photoshop.
- The pro tools for smoothing skin color and fixing texture, and when to use each.
- The critical mistakes that can ruin your photos, and how to avoid them.
- Advanced tips to take your retouching to the next level.
- A dedicated video tutorial to see the technique in action.
- A special offer to make the entire process faster for you.
Let’s dive in and transform your retouching skills.
“DETAILS MAKE PERFECTION, AND PERFECTION IS NOT A DETAIL.”
— Leonardo da Vinci
What is Frequency Separation? The Secret to High-End Skin Retouching
Okay, let’s forget the complicated name for a second and use an analogy.
Imagine your photograph is a brick wall.
The bricks themselves represent the underlying colors, tones, shadows, and highlights. Simply said, these are the image's broader colors and shapes. This is your Low Frequency.
The fine details—the skin pores, the tiny hairs, the wrinkles, the sharp edges—are the mortar, the cracks, the rough texture on the brick surface. This is your High Frequency.
Normally, when you work in Photoshop the two bricks and the mortar are stuck together. If you try to fix the color of a brick, you smudge the texture. And you will ruin the color if you attempt to fix the texture.
Frequency Separation is the incredible process that lets us digitally separate the "bricks" from the "mortar." We can put them on two different, transparent layers.
Why is this a game-changer?
Because for the first time, you gain complete control to edit color and texture independently:
- Have uneven, blotchy, or red skin tones? You can fix them on the Low Frequency (Color) layer without blurring or destroying the essential skin pores.
- Have a pimple, a scar, or a stray hair? You can fix it on the High Frequency (Texture) layer without smudging the beautiful colors and tones underneath.
This separation is the key to high-end skin retouching. It allows you to create perfectly smooth skin that still looks breathtakingly real.
The Step-by-Step Frequency Separation Workflow
Ready to try it? Open a portrait photo in Photoshop. For the best results, start with a high-quality, well-lit photo where the skin texture is clearly visible.
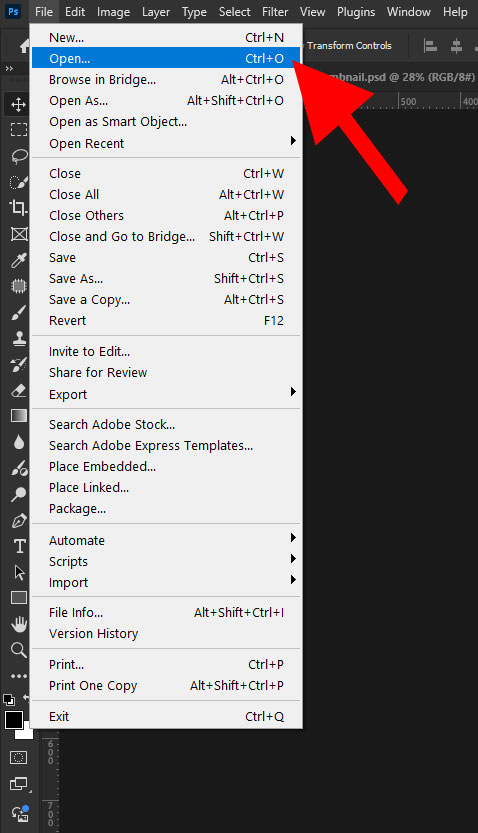
Step One: Opening The Image
Click the open button after selecting the file option.
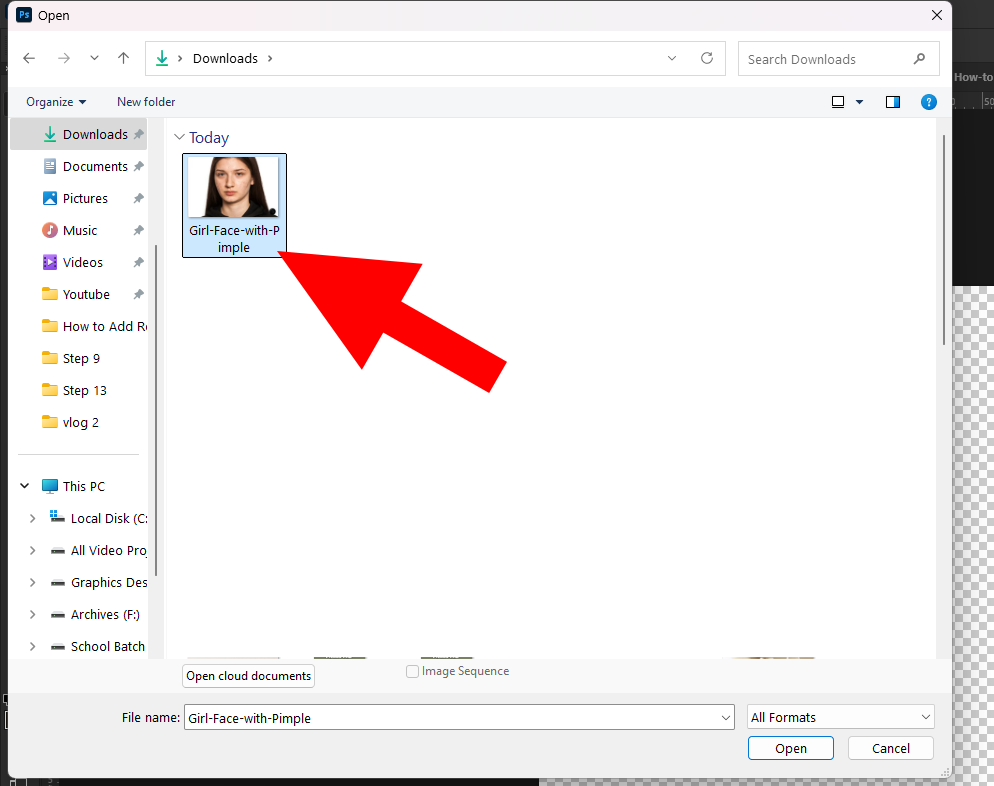
Step Two: Selecting an Image
Click "open" once you've selected the image.
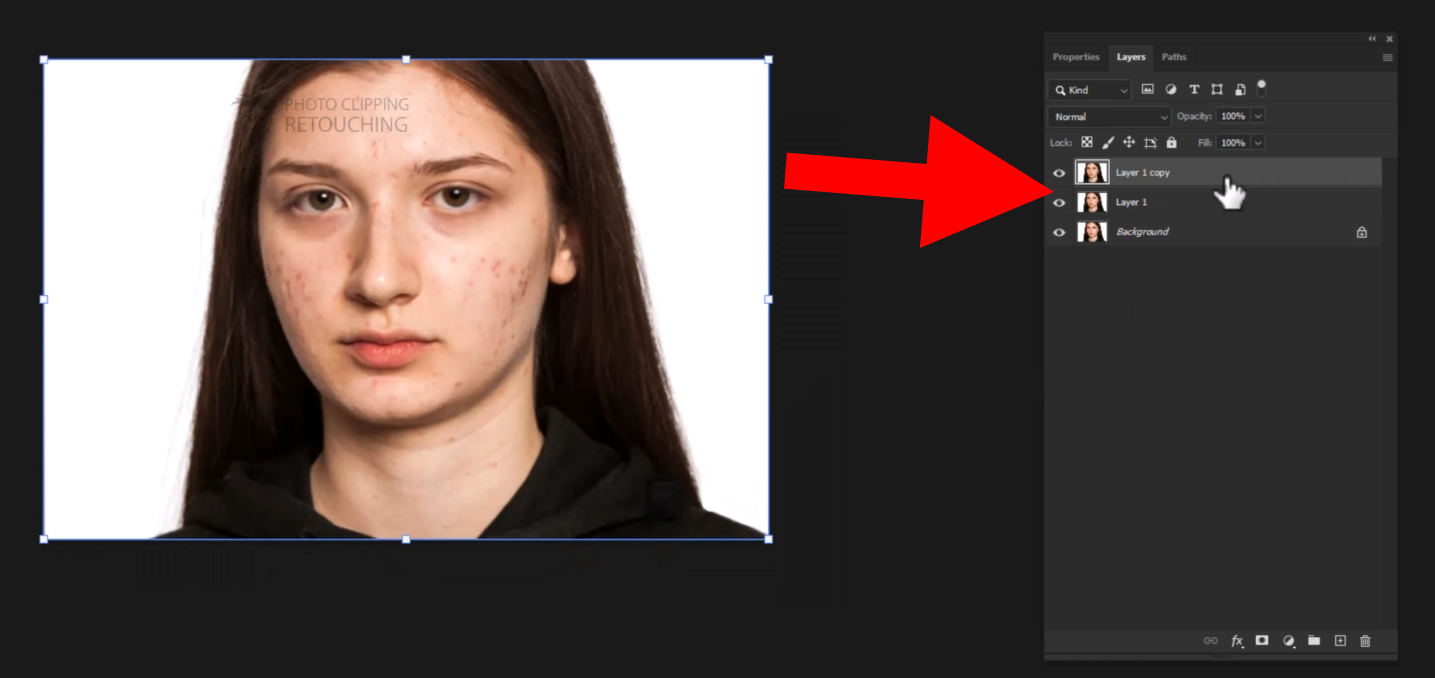
Step Three: Duplicate The Layer
Press Ctrl + J two times and make two copy layers.
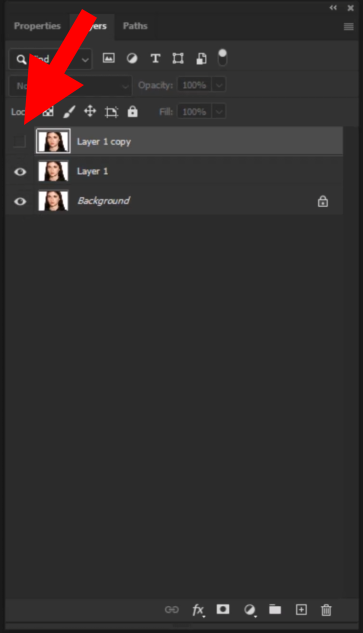
Step Four: Turn off the layer
Turn off the upper layer by pressing the eye icon.
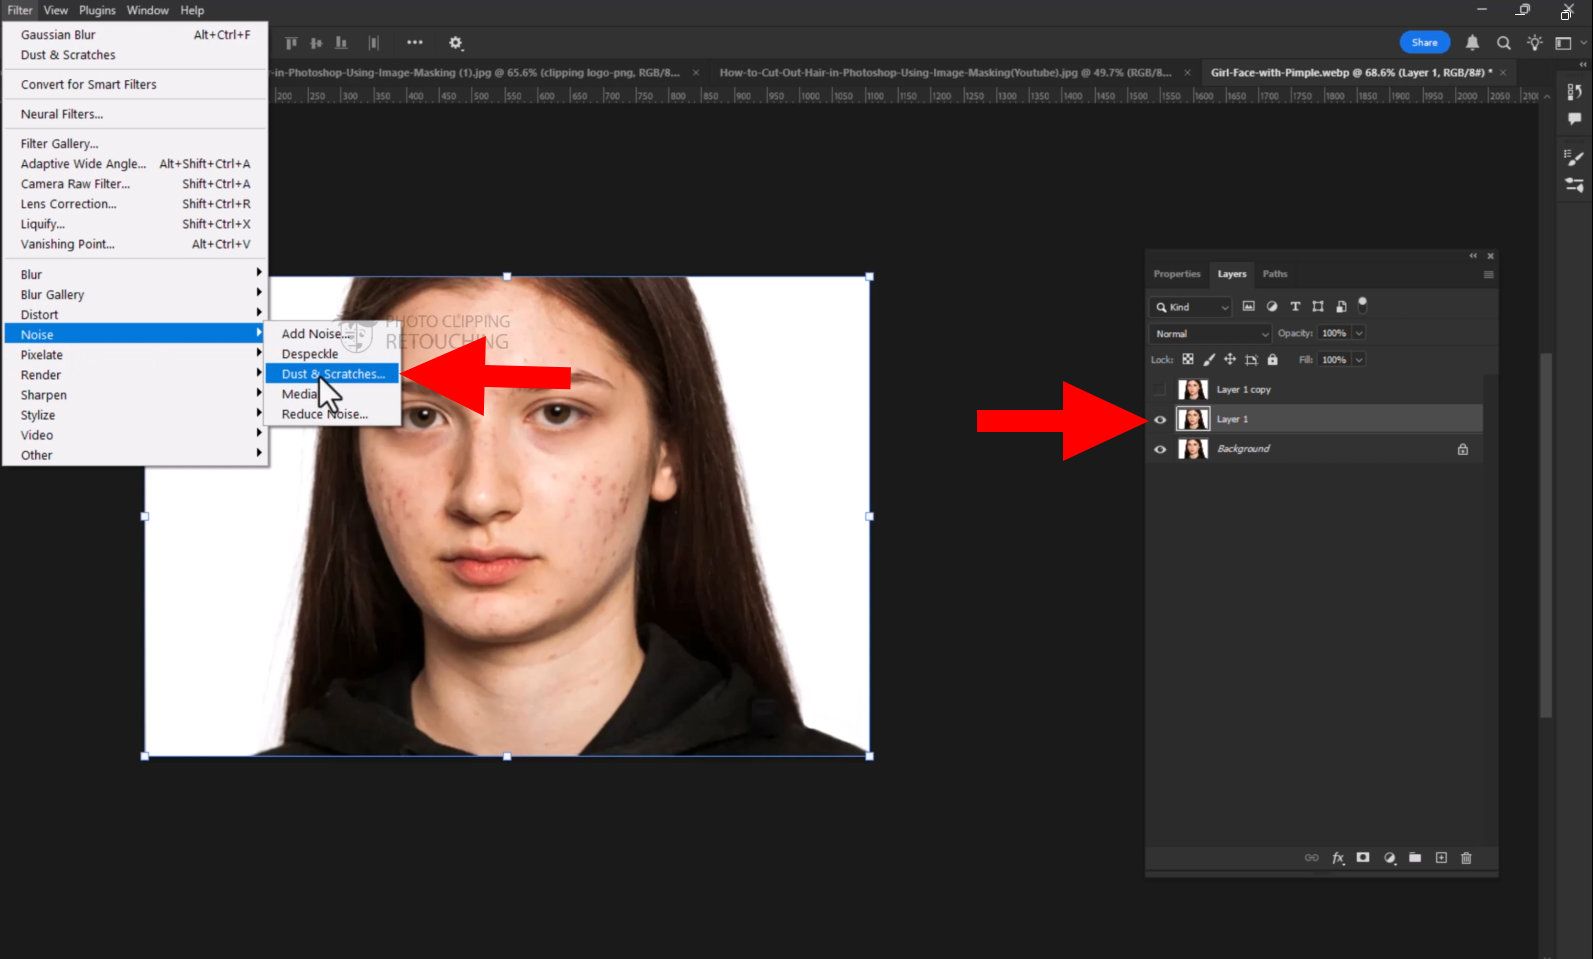
Step Five: Selecting the Dust & Scratches Option
- Select the middle layer.
- Then go to Filter > Noise > Dust & Scratches option.
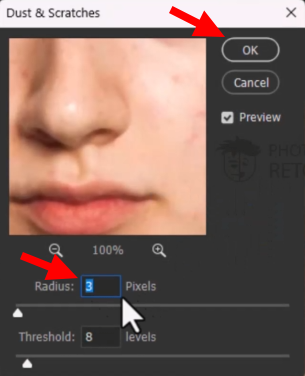
Step Six: Selecting The Amount
Select all the numbers given in the screenshot and press ok.
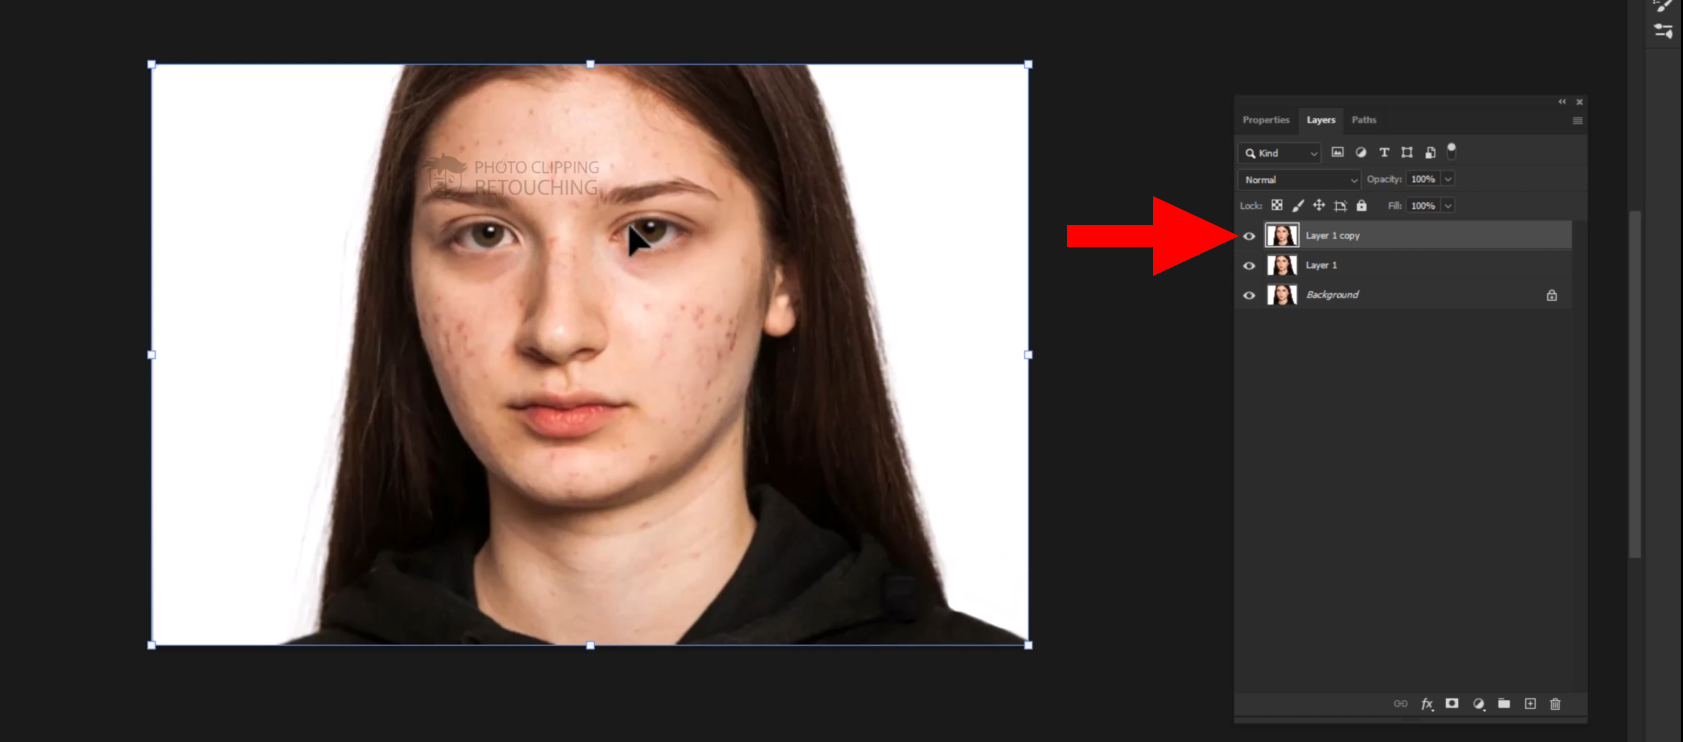
Step Seven: Turning On The Top Layer
Click on the eye icon for turning on the layer.
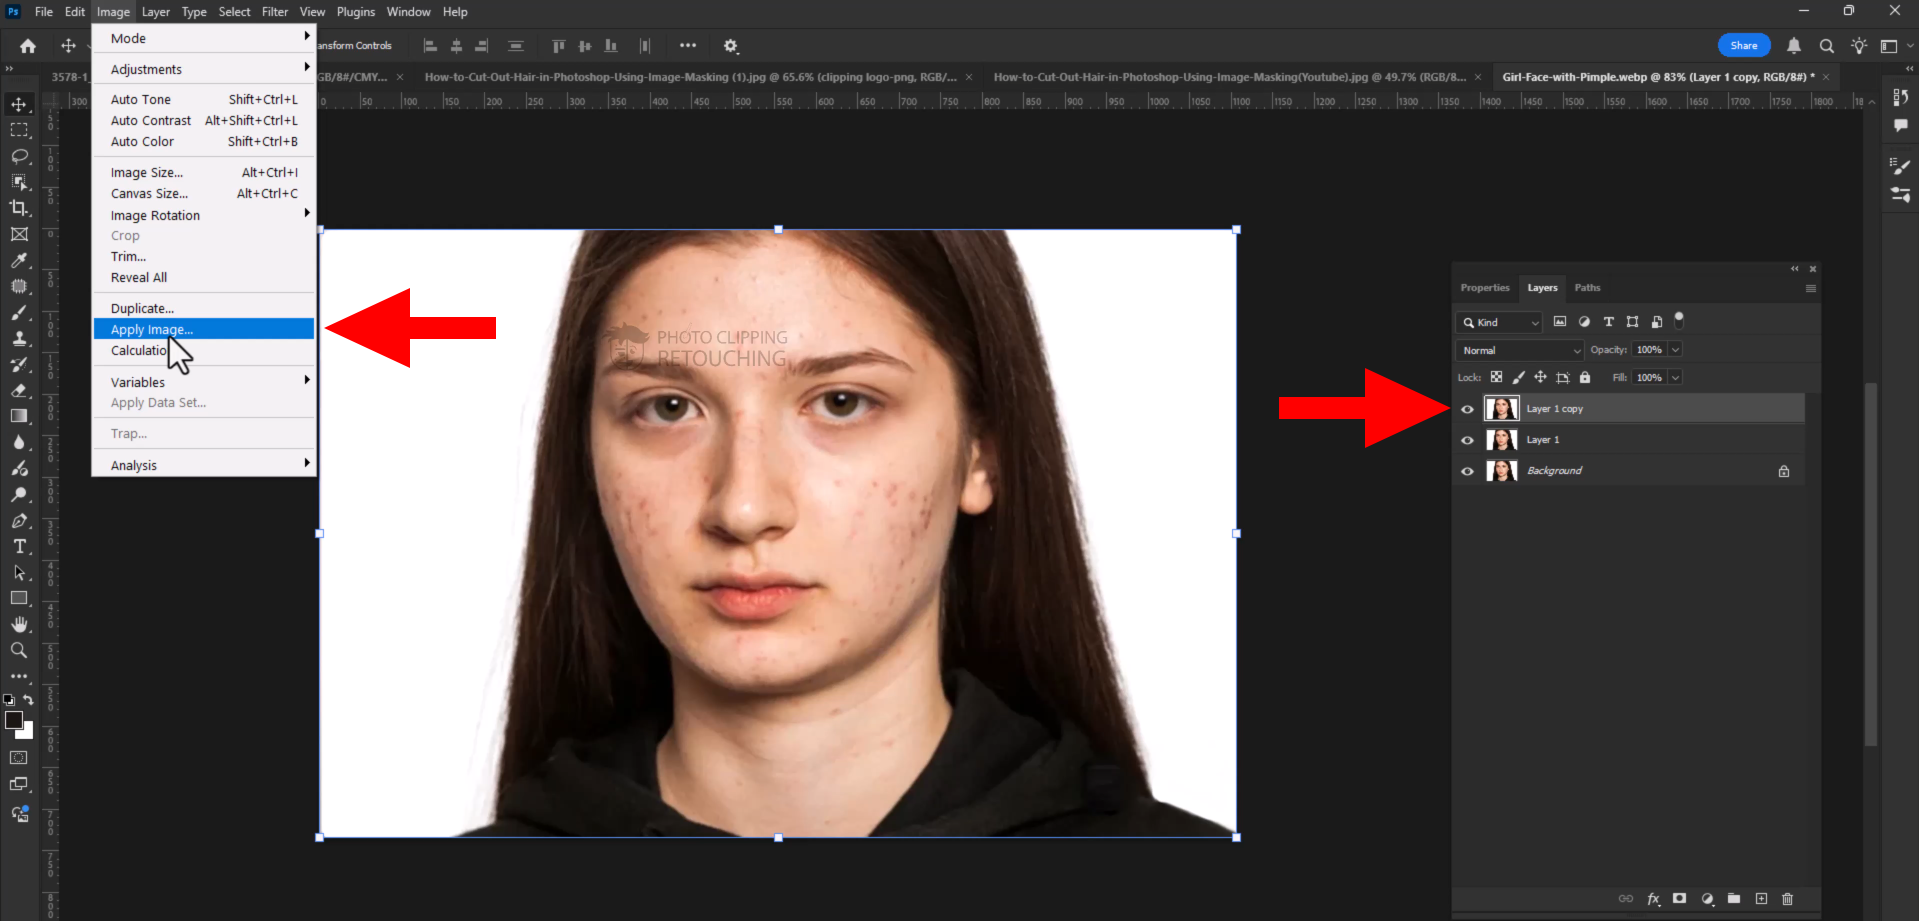
Step Eight: Going To Apply Image Option
- First, select the top layer.
- Then go to Image > Apply Image
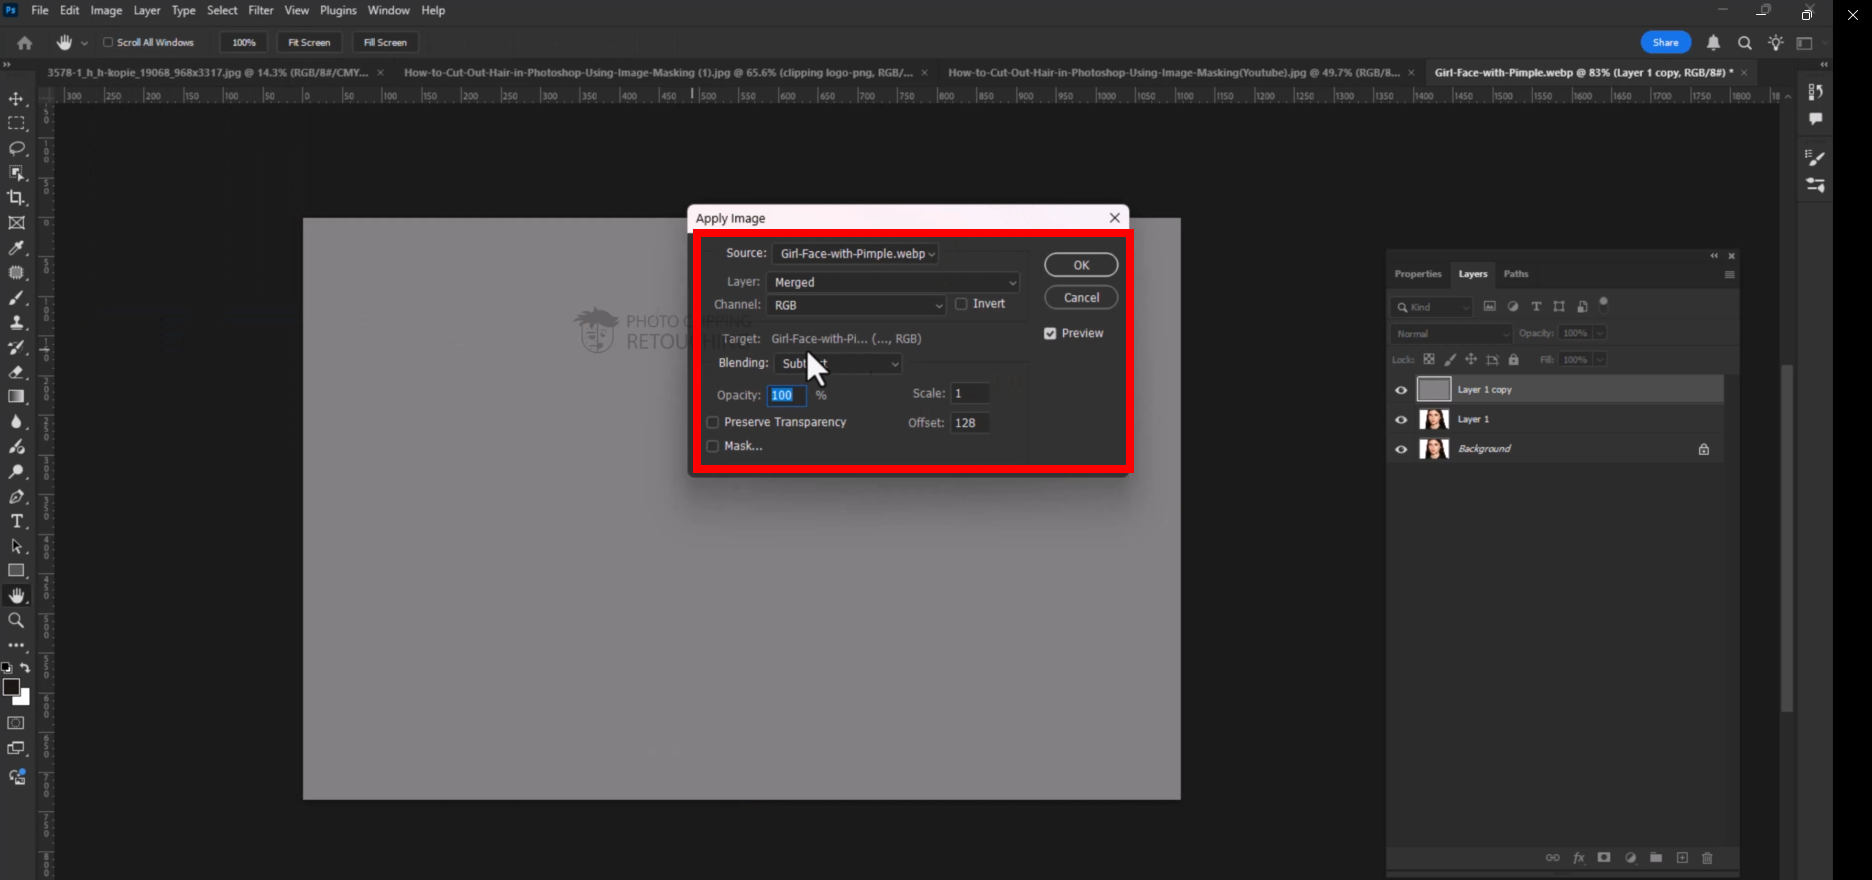
Step Nine: Selecting The Amount
Select all the numbers and the necessary things are given in the screenshot, then press ok.
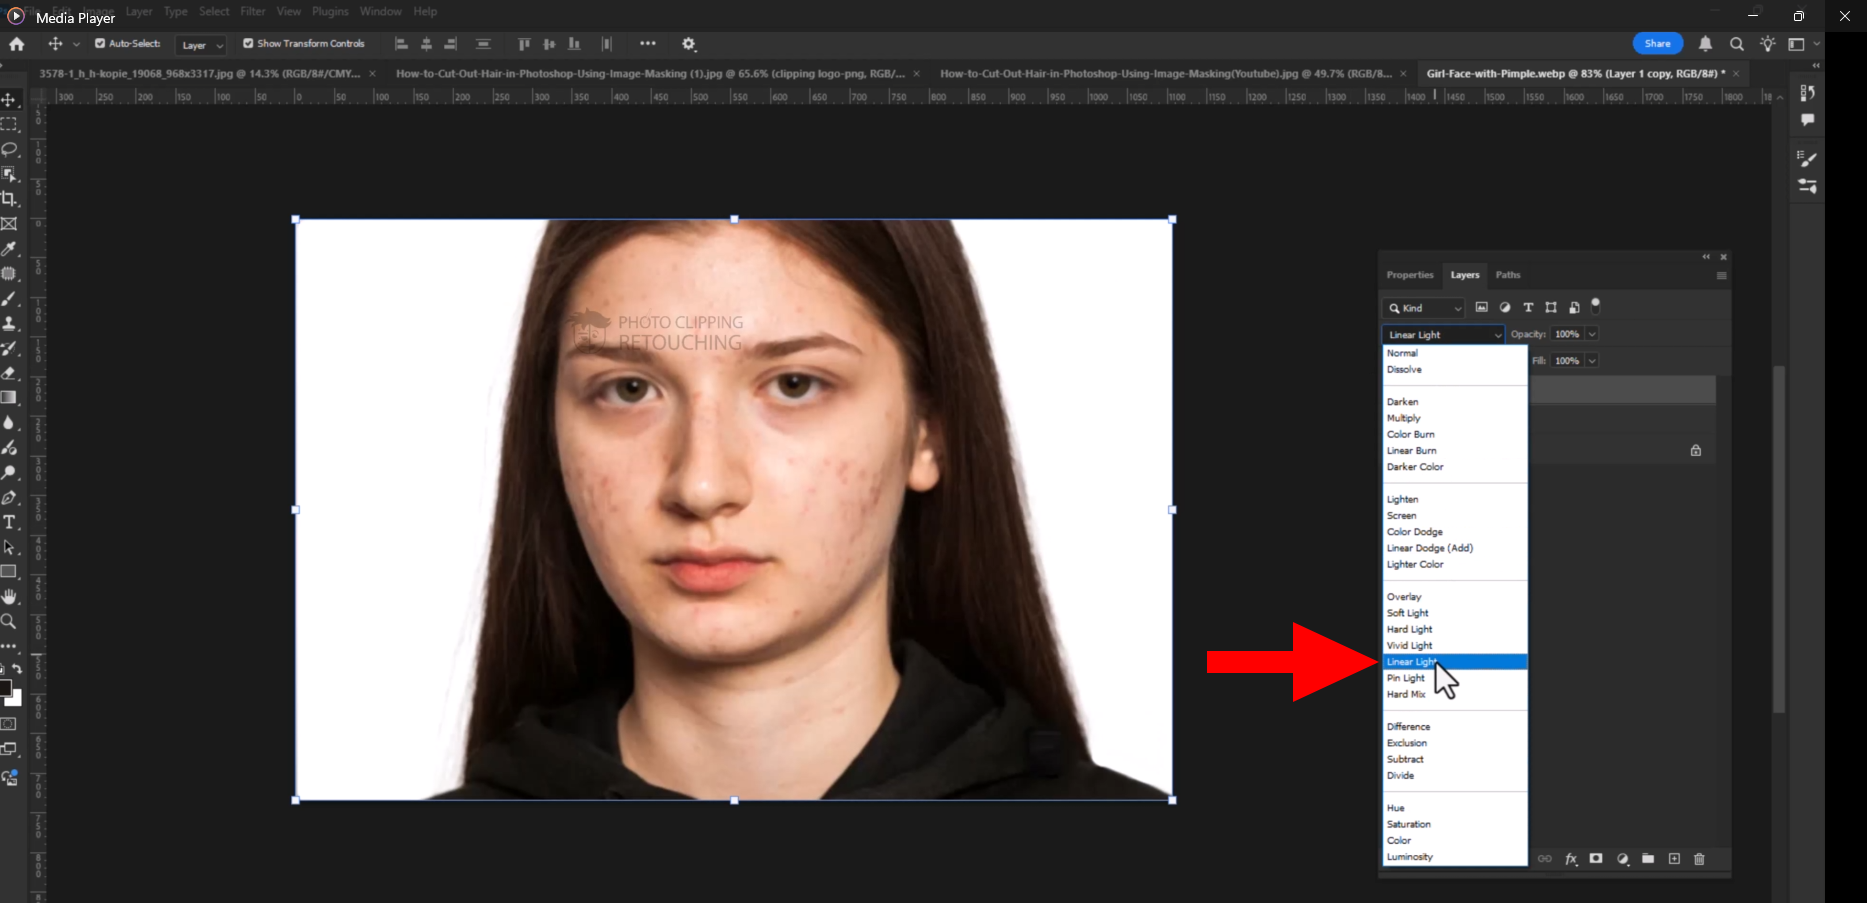
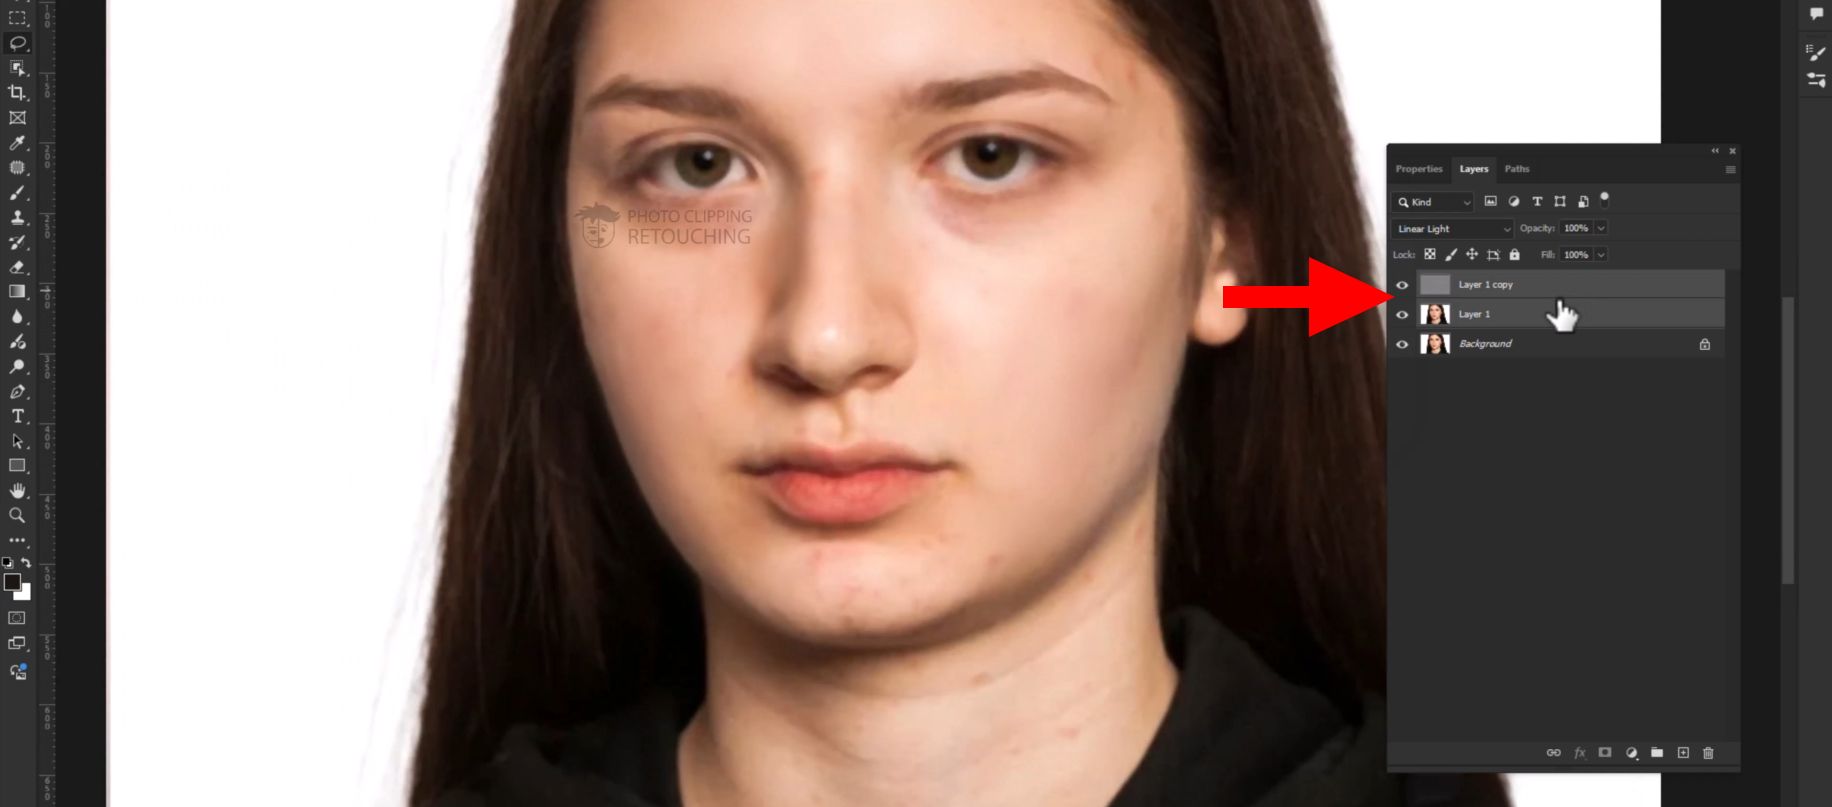
Step Ten: Selecting Linear Light
Choose the Linear Light option on the right side.
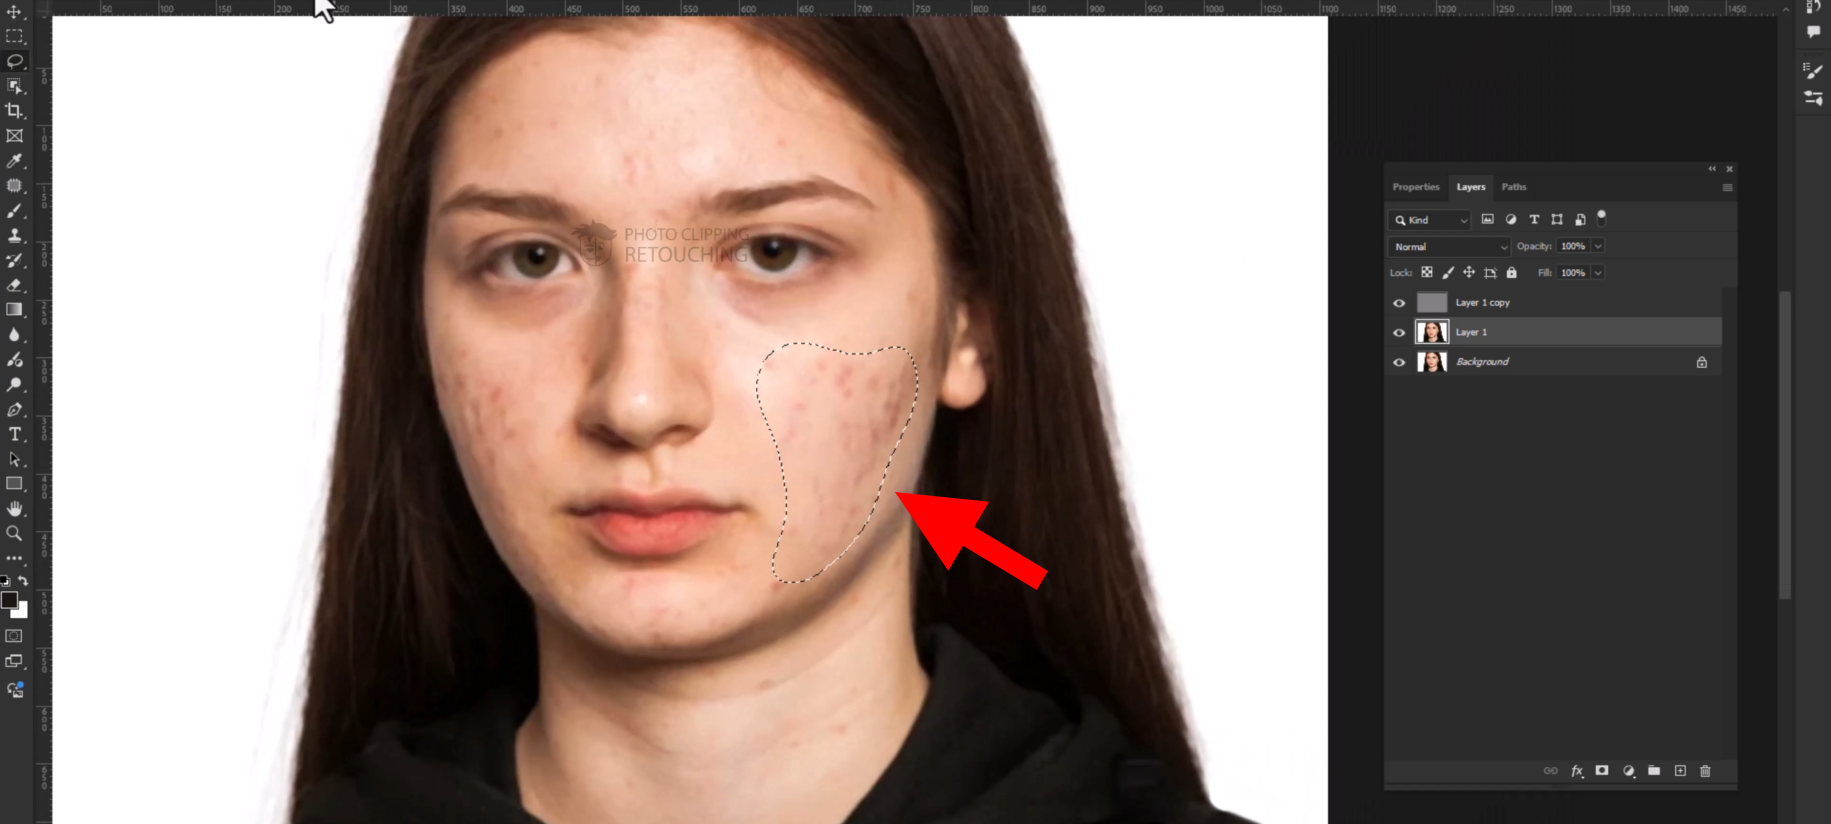
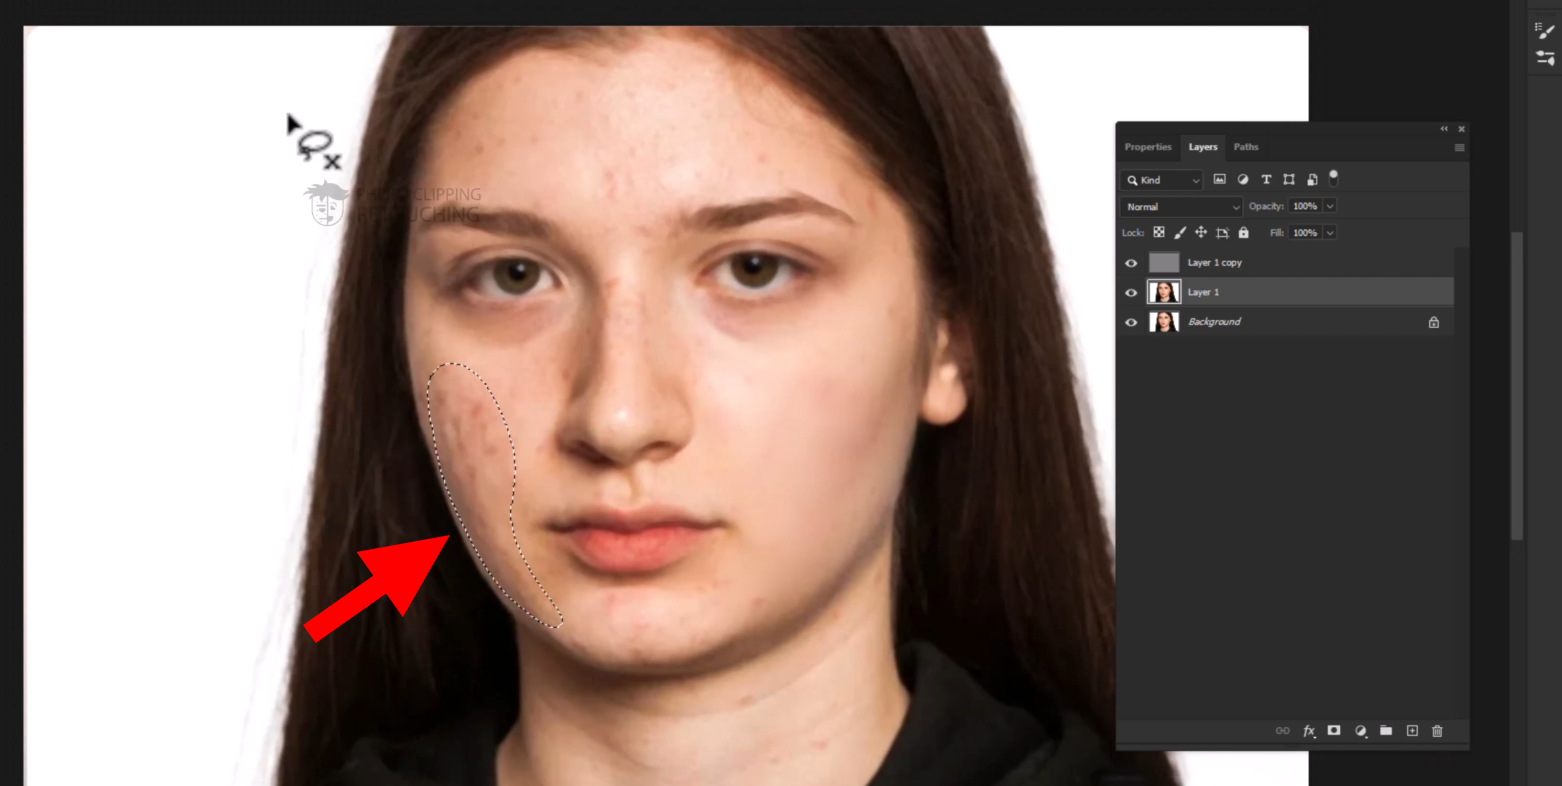
Step Eleven: Selecting the Lasso Tool
- Select the middle layer.
- Press (L) to select the lasso tool.
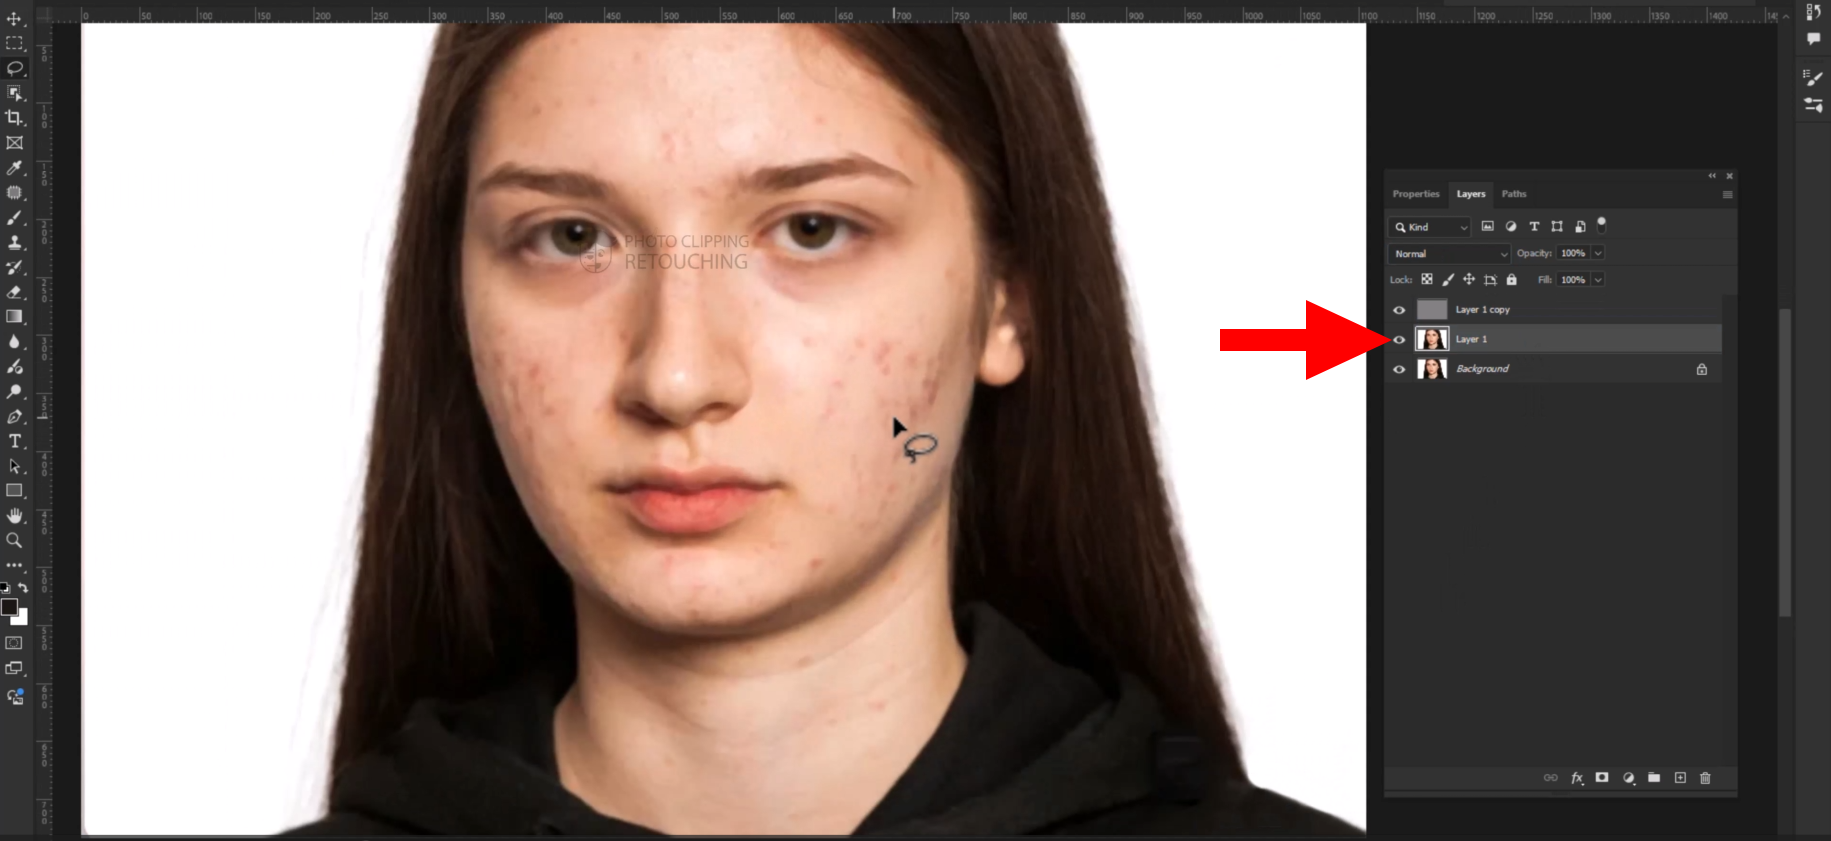
Step Twelve: Selecting The Area
Select the area you want to work.
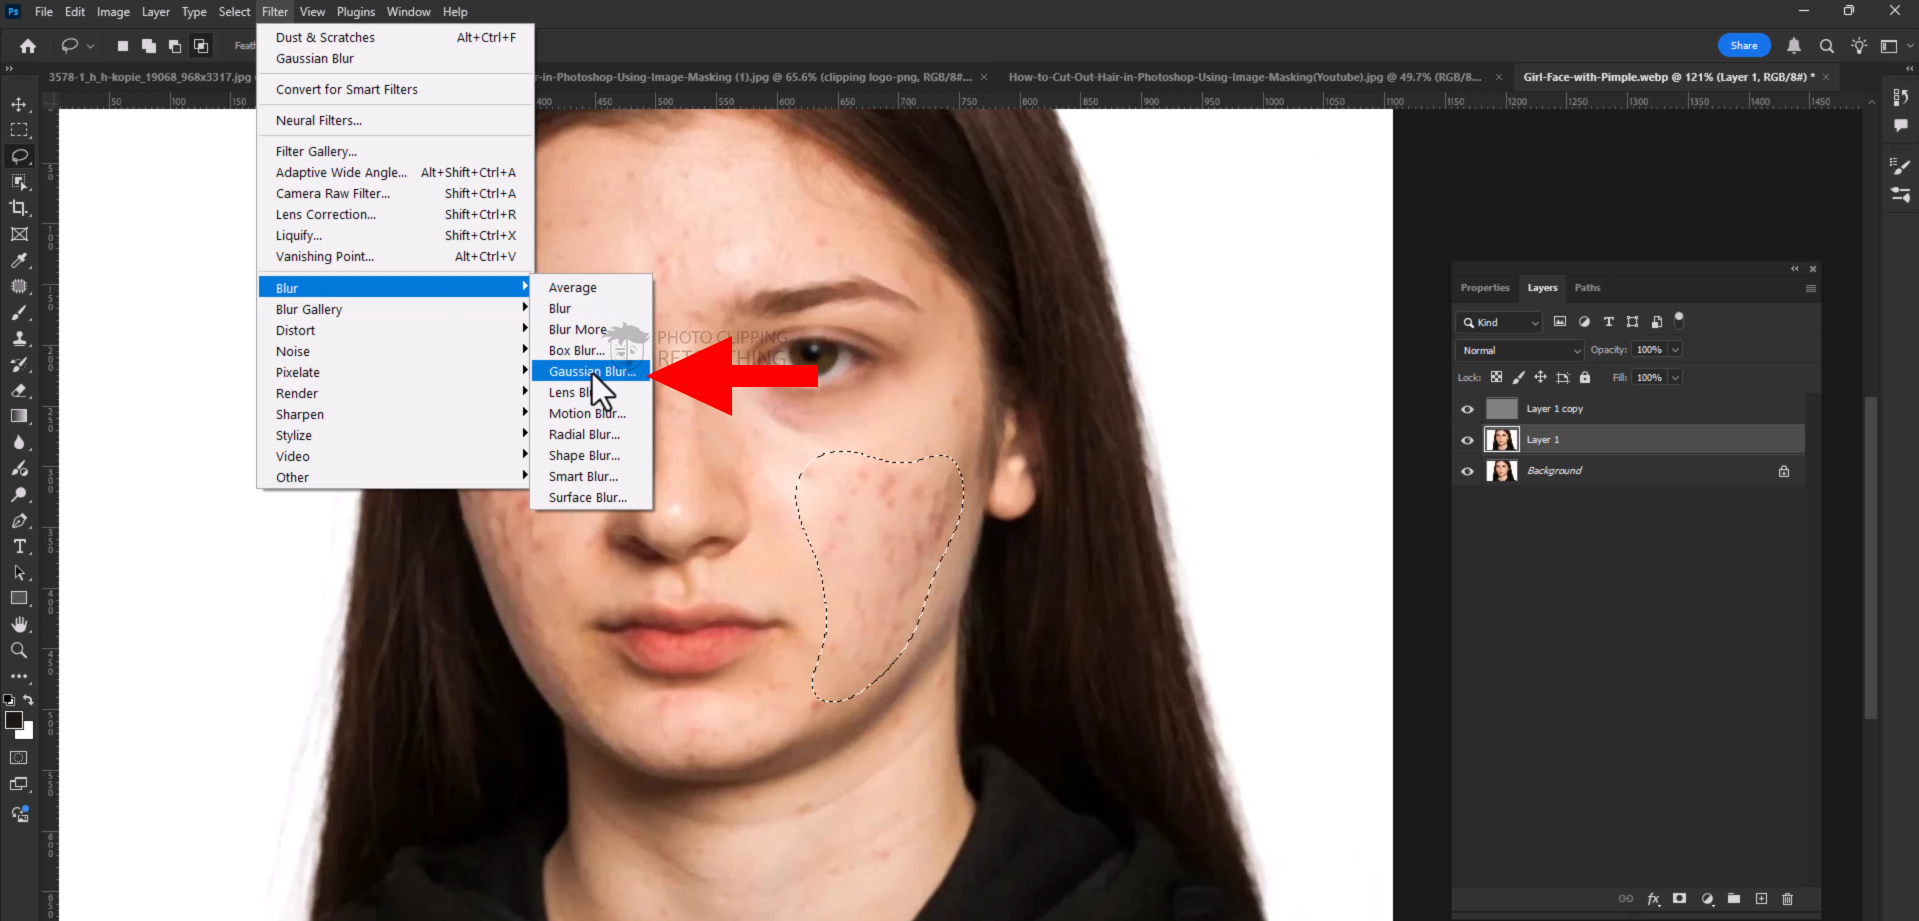
Step Thirteen: Selecting the Gaussian Blur Option
Go to the Filter option, then select the Blur option. Now select the Gaussian Blur option.
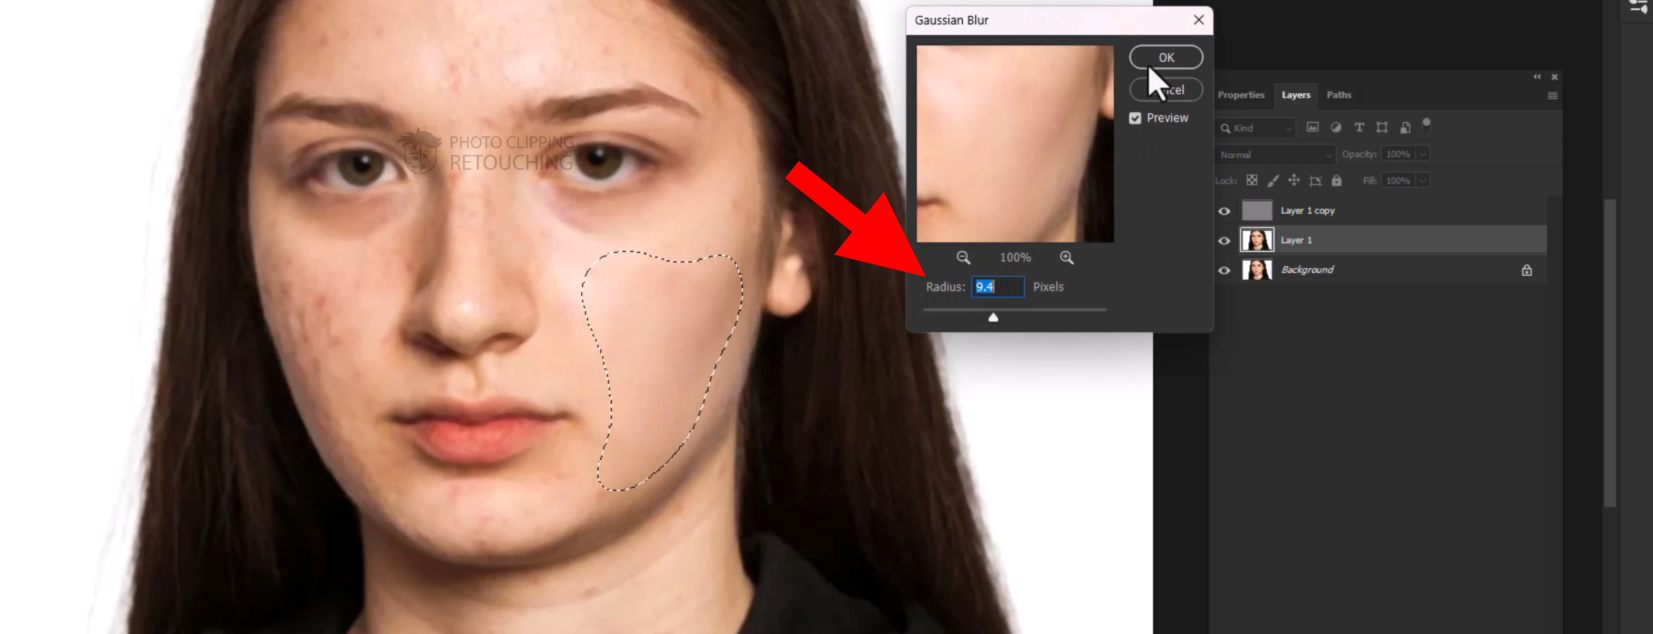
Step Fourteen: Selecting The Radius Amount
After choosing the radius size shown in the screenshot, click "OK."
Step Fifteen: Deselect The Selected Area
Press Ctrl + J to deselect the area that was selected.
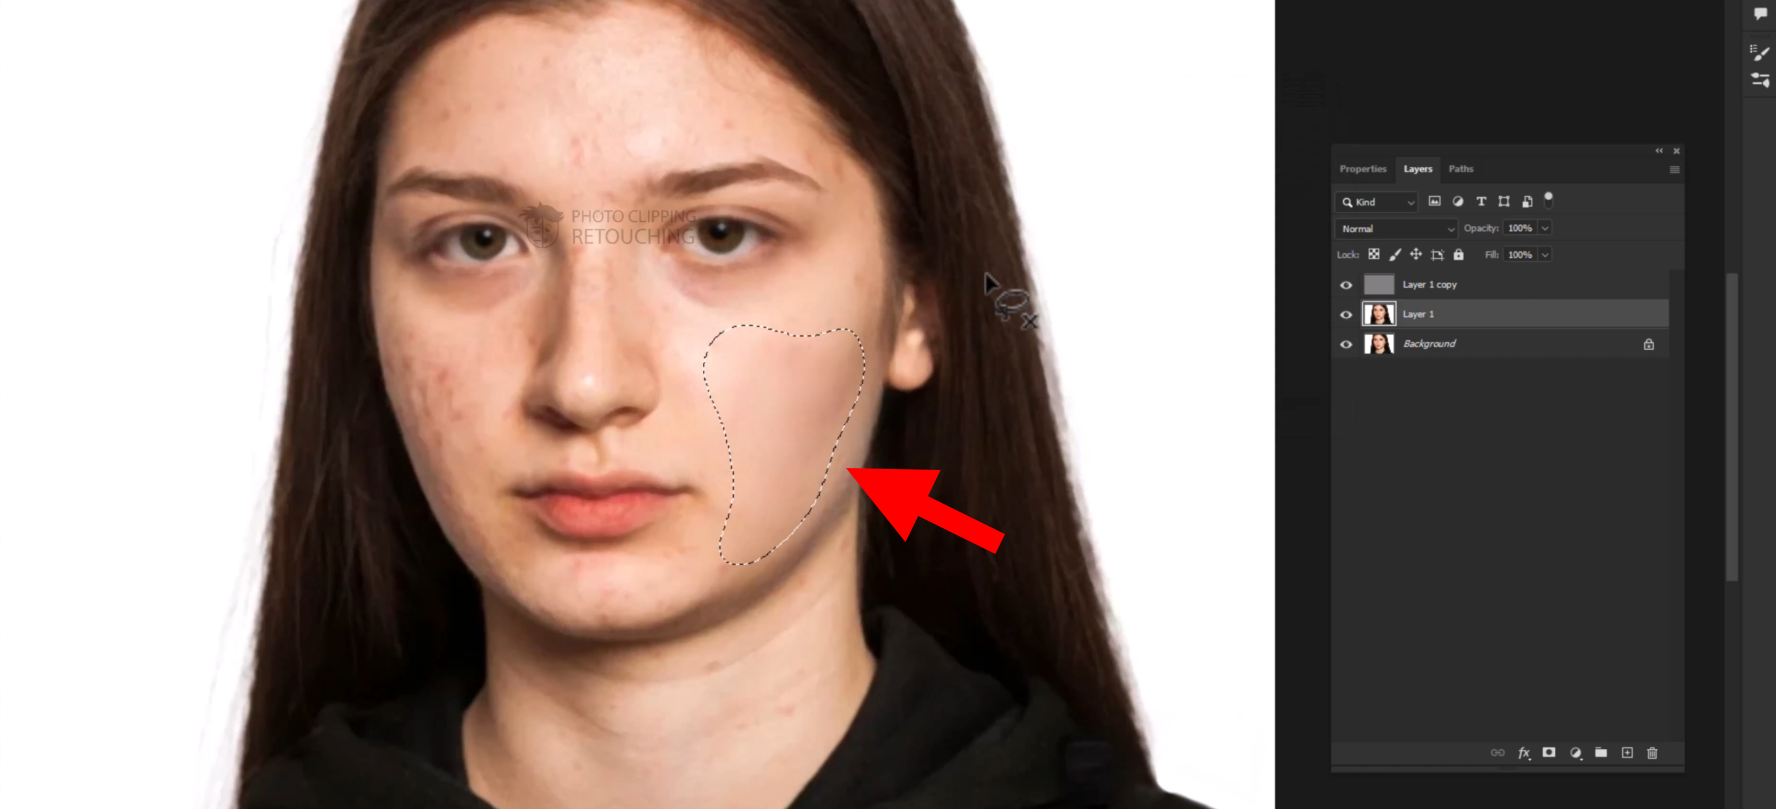
Step Sixteen: Selecting The Area
- Now select another area you wanted to work in.
- Now Follow steps (13–15) exactly now.
- You have to do it again and again in the area you wanted to work until it looks perfect.
Step Seventeen: Merging Two Layers
- After completing step sixteen perfectly, you have merged the top two layers.
- Holding down Ctrl, choose the first two layers.
- The layers can then be merged by pressing Ctrl + E.
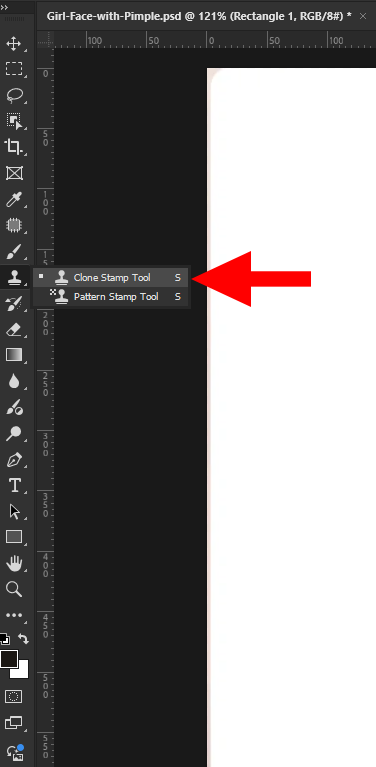
Step Eighteen: Select the Clone Stamp Tool
Go to your left sidebar and select clone stamp.
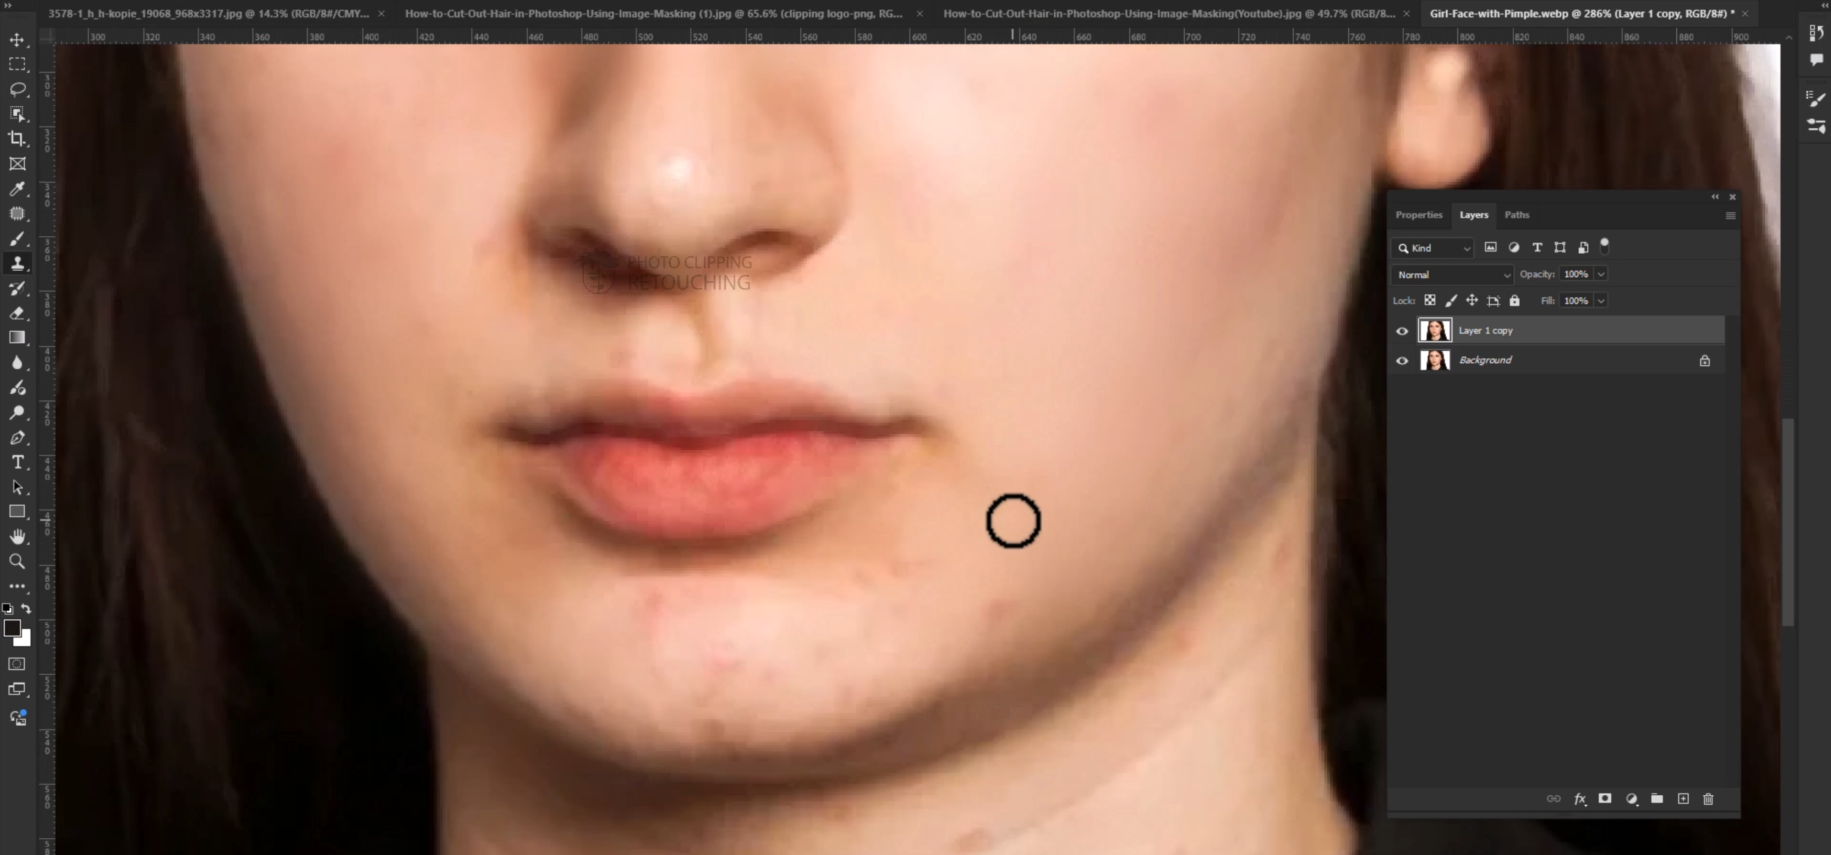
Step Nineteen: Using Clone Stamp
- Hold Alt and click somewhere in a fresh area.
- Click on the red area or the area that needs to be fixed.
- Do this again and again until it looks perfect.
Step Twenty: Saving The Image
- After completing the work perfectly, go to your right side and click on the file option.
- Then click on the Save As option.
- Now save it as you wanted. You can save it in JPG, PSD format.
Finally, your work is done.

Watch and Learn: Our Flawless Skin Photoshop Tutorial Video
Reading the steps is one thing, but seeing the process in action makes it click. In this video, one of our senior editors walks you through the entire frequency separation technique, from initial setup to the final, artistic touches. You can see the brush strokes, the settings we use, and how we handle problem areas in real-time.
Common Mistakes to Avoid for High-End Skin Retouching
This technique is incredibly powerful, but a few wrong moves can lead to unnatural results. Here are the most common mistakes we see and, more importantly, how you can avoid them to achieve a high-end skin retouching look.
- Mistake #1: Selecting the incorrect Gaussian Blur Radius.
- The Problem: If your initial blur radius is too low, you haven't separated the texture properly. If your blur is too high, you can create strange, glowing "halo" effects around sharp edges like the jawline or nose.
- The Fix: Always zoom in to 100% and look at the fine skin pores when setting your blur. The perfect moment to stop is the exact point when that fine texture just melts away.
- Mistake #2: Over-using the Mixer Brush and Flattening the Face.
- The Problem: This is the most common error. New users get excited with the Mixer Brush and start painting everywhere. This destroys the natural shadows and highlights that give a face its shape, resulting in a flat, lifeless, "plastic mannequin" look.
- The Fix: Be subtle! Less is more. Only paint over the areas that truly need it. Your goal is to even out color transitions, not to eliminate shadows. A good practice is to lower the opacity of your Low Frequency layer to 0% after you're done, then slowly increase it until the correction looks natural.
- Mistake #3: Not Cleaning Up Obvious Blemishes First.
- The Problem: On the texture layer, you try using the Clone Stamp alone to fix a large, obvious pimple. This can sometimes leave a weird, discolored mark because the underlying color is still wrong.
The Fix: Before you even start the frequency separation process, create a new, blank layer. Use the standard Spot Healing Brush to quickly remove any major, distracting blemishes first. This basic cleanup makes the advanced work much cleaner.
Pro-Level Tips to Edit Skin Texture Like an Expert
Want to take it even further? Here are a couple of advanced techniques our editors use to edit skin texture with maximum precision.
- Pro Tip #1: Use a "Helper" Layer to See Imperfections.
Sometimes it's hard to see subtle blotches in skin tone. Create a "helper" layer to make them stand out. Go to Layer, then select New Adjustment Layer, then choose Black & White. Place this layer on top of your Low Frequency layer (but inside the main group). This removes all color distraction, making it much easier to see and smooth out uneven lighting and tones with your Mixer Brush. You can delete the helper layer when you're done. - Pro Tip #2: Dodge and Burn on the Color Layer.
You can enhance the natural contours of the face using Frequency Separation. Create a new layer above your Low Frequency layer. Select either the Soft Light or Overlay blending modes. Now, using a very soft, white brush with a low flow (1-2%), you can paint over areas you want to brighten (like under the eyes or down the bridge of the nose). Use a black brush to darken and enhance shadows (like under the cheekbones). This adds incredible depth to your portrait.
A Special Gift: The PCR Quick-Setup Photoshop Action
We know the setup process involves a lot of specific steps and settings. To make your life easier and to thank you for reading our guide, we have created a free, custom Photoshop Action that performs the entire setup for you in a single click.
This action will create the layers, name them correctly, apply the Gaussian Blur (it will even pause to let you choose your radius!), run the Apply Image command, and put everything in a tidy, organized group. All you need to do is concentrate on the creative part, which is the retouching.
Need Perfect Results Without the Hours of Work?
Mastering this technique takes time and practice. When you're facing a tight deadline, have a large batch of images for your e-commerce store, or need absolutely guaranteed professional results for a client's wedding or ad campaign, You might not have enough time to complete everything on your own.
That’s what we’re here for.
The international team at PhotoClippingRetouching.com uses these advanced techniques every single day to deliver pixel-perfect images to clients on every continent. If you want flawless skin retouching that is fast, affordable, and reliable, let our experts handle it for you.
CONCLUSION
You now have the complete professional workflow for frequency separation in Photoshop. We've covered the setup, the tools, the common mistakes, and even some advanced tips. The most important thing to remember is that this is a skill. It becomes better with practice, just like any other craft.
Don't give up if the first attempts you make don't work out. Every professional retoucher started exactly where you are now. Open up different photos—some with soft light, some with harsh light—and practice the techniques we’ve shown you. Learn the effects of the Radius setting on the image. Get a feel for the Mixer Brush.
By taking the time to learn this method, you are investing in your ability to create truly beautiful, high-end images. You are learning how to perfect skin texture in Photoshop, not just erase it. This is what separates amateurs from professionals. Keep practicing, stay patient, and you will be amazed at the quality of work you can produce.
