
INTRODUCTION
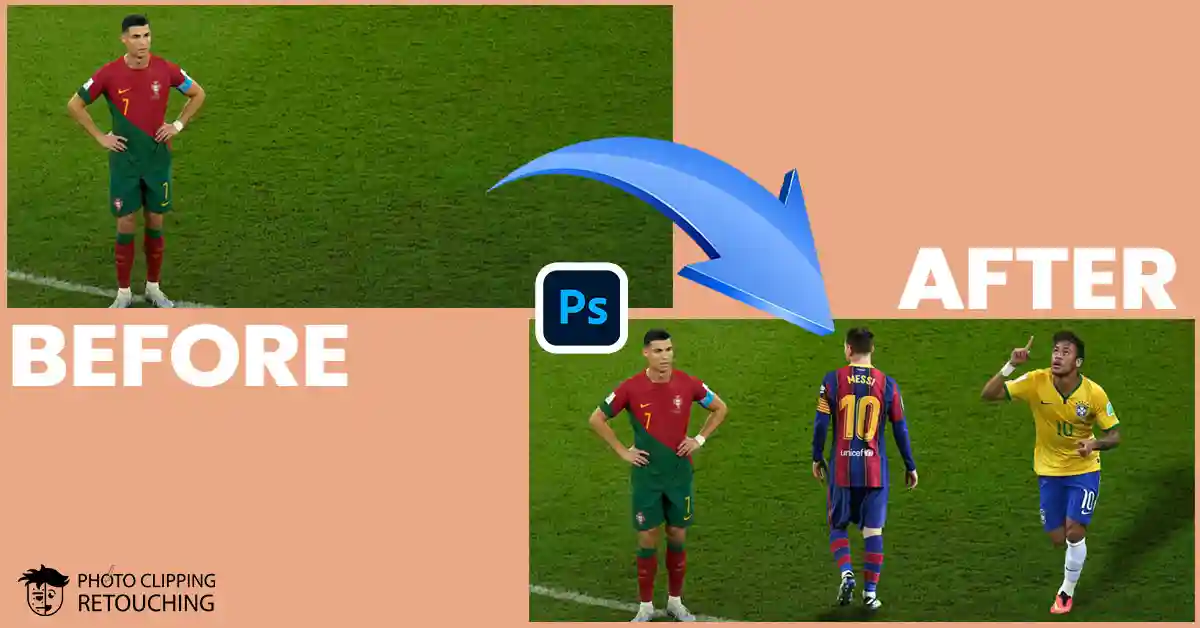
Hello from the expert team at PhotoClippingRetouching.com! Have you ever wanted to create a stunning image that blends multiple photos into one new reality? This art of combining images, known as compositing, is one of the most powerful and creative skills in all of Photoshop. It's the technique behind breathtaking advertisements, stunning movie posters, and professional e-commerce product showcases. The professional method behind this magic is called layer mask compositing.
Many people try this by crudely cutting and pasting objects, only to end up with images that look fake, with hard, amateurish edges and unrealistic shadows. The secret to a believable, professional result lies in creating a truly seamless blend, making it look like all the elements were captured in a single, perfect photograph.
In this ultimate guide for 2025, we will teach you not just the steps, but the core concepts of how to master layer masks. You'll learn everything you need to know, from the foundational principles to the practical steps for creating clean selections, blending objects perfectly, and manipulating shadows for a truly professional result.
“EVERY ACT OF CREATION IS FIRST AN ACT OF DESTRUCTION.”
— Pablo Picasso
Why Layer Masks Are the Key to Seamless Photo Composites
Before we jump into the tutorial, it’s essential to understand why professionals universally rely on Photoshop layer masks. Think of a layer mask as a magic, reversible, and completely forgiving invisibility cloak for your layer.
When you use the Eraser Tool to remove part of an image, those pixels are gone forever. This is called destructive editing. If you make a mistake, or change your mind later, there is no way to get those original pixels back. This can be a disaster in a professional project.
A layer mask, however, is non-destructive. It never deletes your pixels; it simply controls which parts of the layer are visible and which are hidden.
- On a layer mask, painting with black renders that area transparent and obscures it.
- White painting exposes that portion of the layer, rendering it completely opaque.
- You can even paint with shades of grey to create semi-transparent effects.
This means if you make a mistake and hide too much, you don't need to undo your work. You simply switch your brush color from black to white and paint the details back in. This incredible flexibility is the key to creating seamless photo composites. It gives you total control to blend edges, refine complex selections, and make tiny, precise adjustments until the final image is perfect.
Anatomy of a Layer Mask
A white or black thumbnail will show up in the Layers Panel next to the thumbnail of your layer when you add a mask.
- The Mask Thumbnail: This is your canvas. Click on the mask to begin painting on it rather than the picture layer. You'll see a white border around it when it's selected.
- The Link Icon: Between the image and the mask, you'll see a small link icon. This means the image and its mask will move together. If you click this link to disable it, you can move the image around while the mask stays in place, allowing for advanced positioning effects.
|
Feature |
Eraser Tool (Destructive) |
Layer Mask (Non-Destructive) |
|
Reversibility |
Permanent. Pixels are deleted forever. |
Fully Reversible. Pixels are only hidden. |
|
Edge Control |
Poor. Edges are hard to blend softly. |
Excellent. Use soft brushes for seamless edges. |
|
Flexibility |
Low. Mistakes are hard to fix. |
High. Edits can be refined at any time. |
|
Professional Use |
Rarely used by professionals. |
Essential tool for all professional work. |
A Practical Guide to Layer Mask Compositing
This tutorial will guide you through the entire project from beginning to end. The process involves opening a background, adding new elements, and then using layer masks and shadow effects to blend everything together realistically.
Follow these steps exactly to create your own composite image.
Step 01: Opening The Image
- Go to left side then click on file option then click on open.
- Then choose the image you wanted to open then press ok.

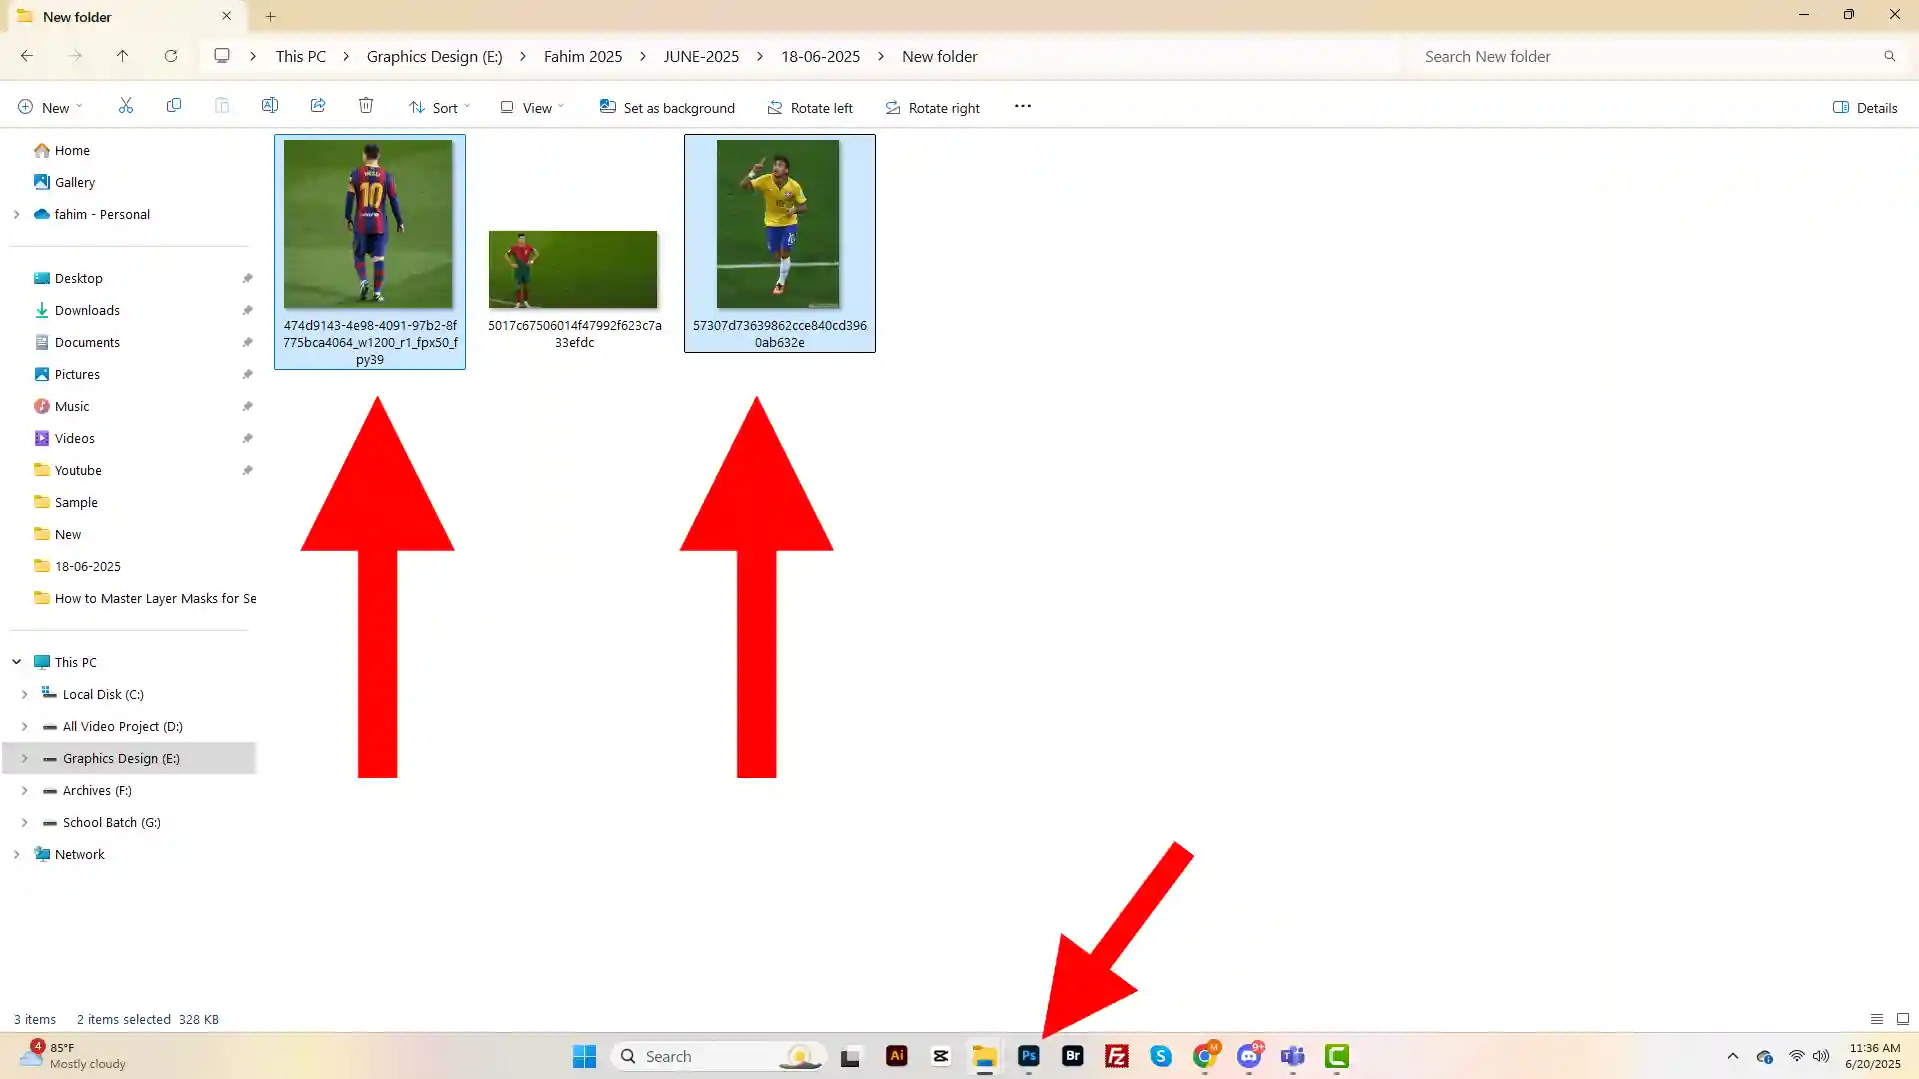
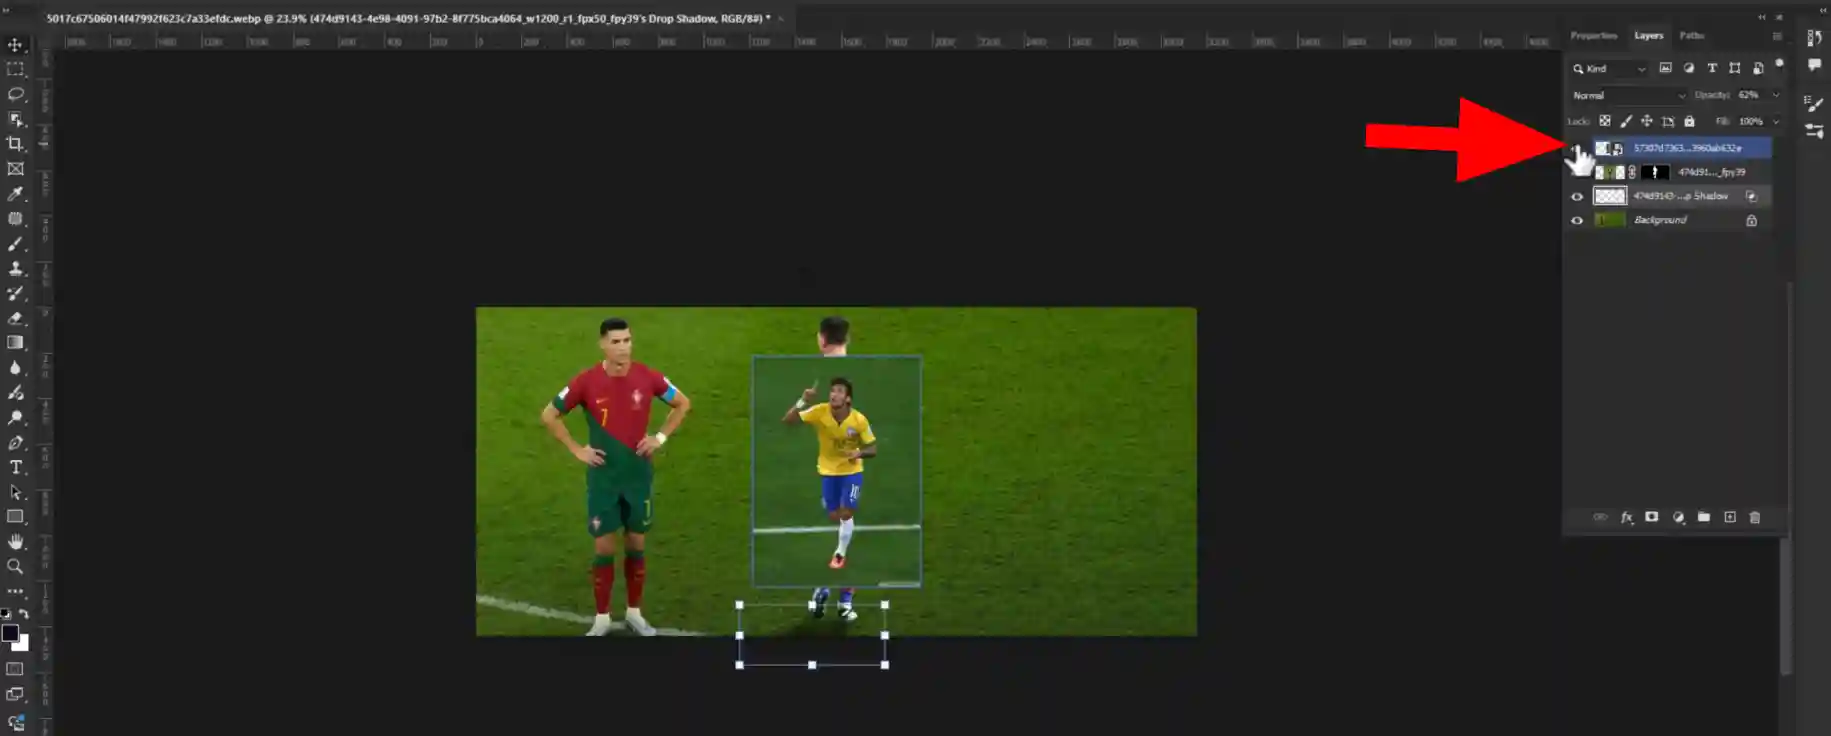
Step 02: Dragging The Images
- Go to the file option where necessary images are kept.
- Hold Ctrl and select the images which you and work it.
- Now drag it into the first image you opened in photoshop and press enter two times.
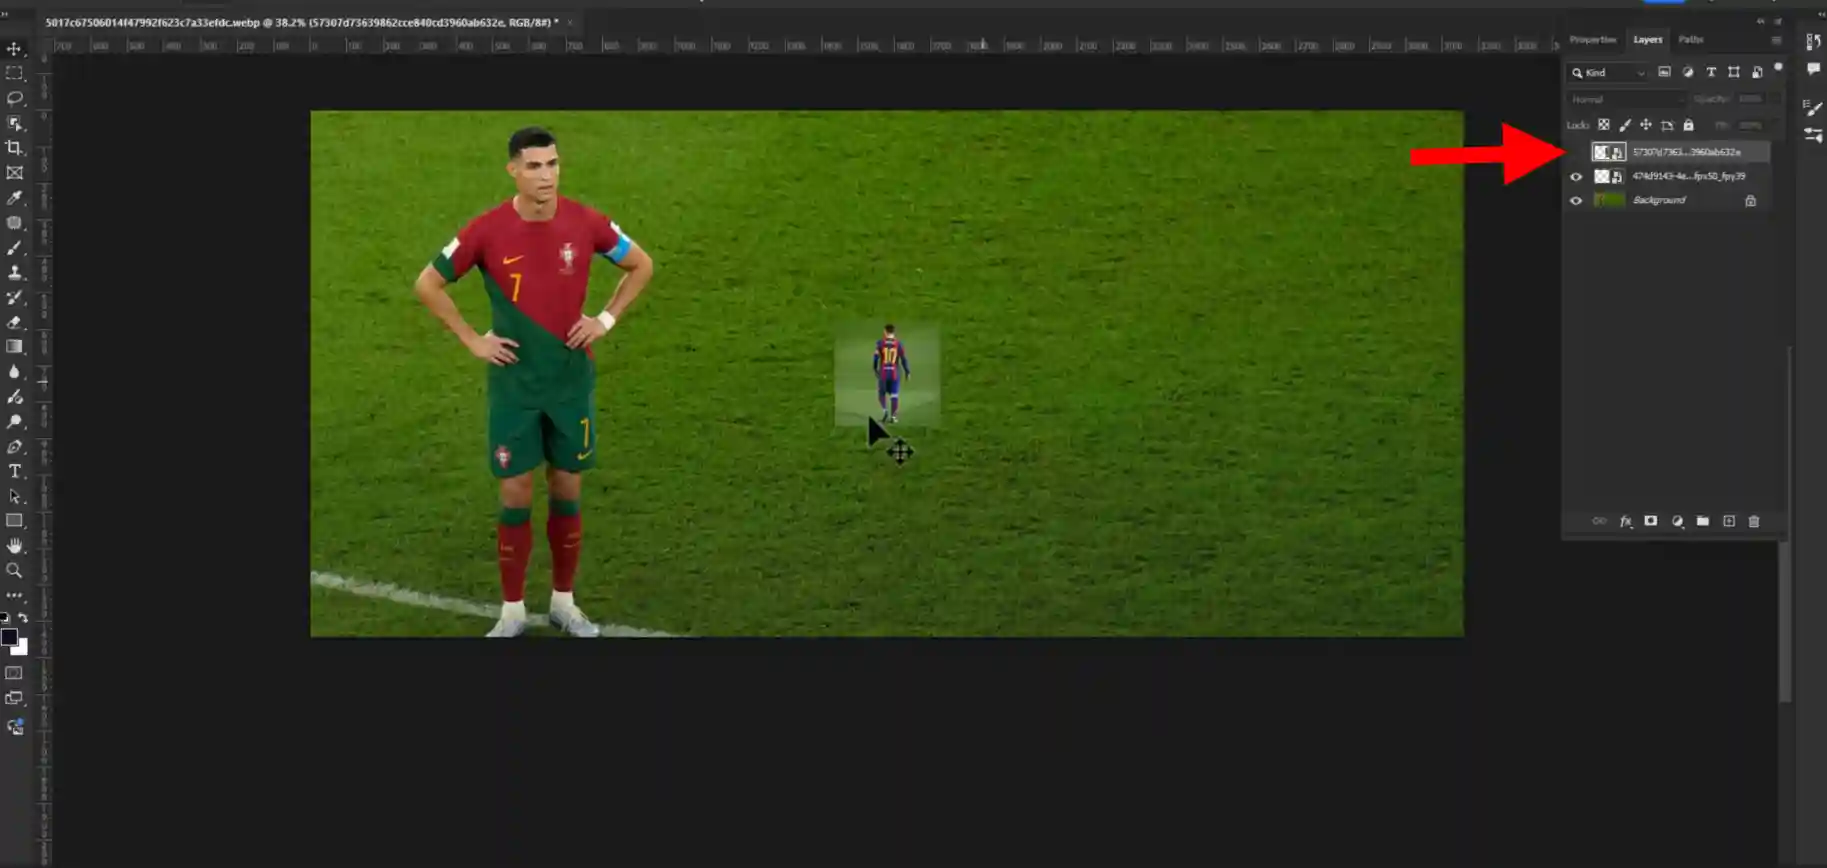
Step 03: Closing The First Layer
Close the first layer by clicking the eye button.
Step 04: Transforming The Image
- Press Ctrl + T for transforming the image.
- Drag it from the corner and make it in perfect shape and press ok.
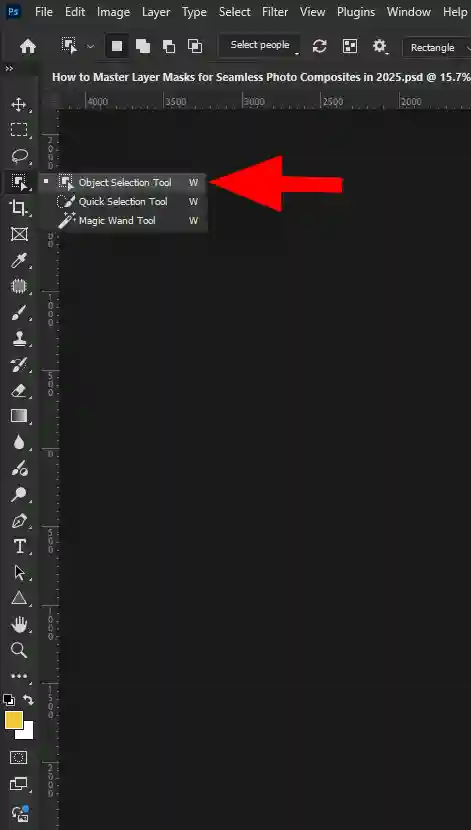
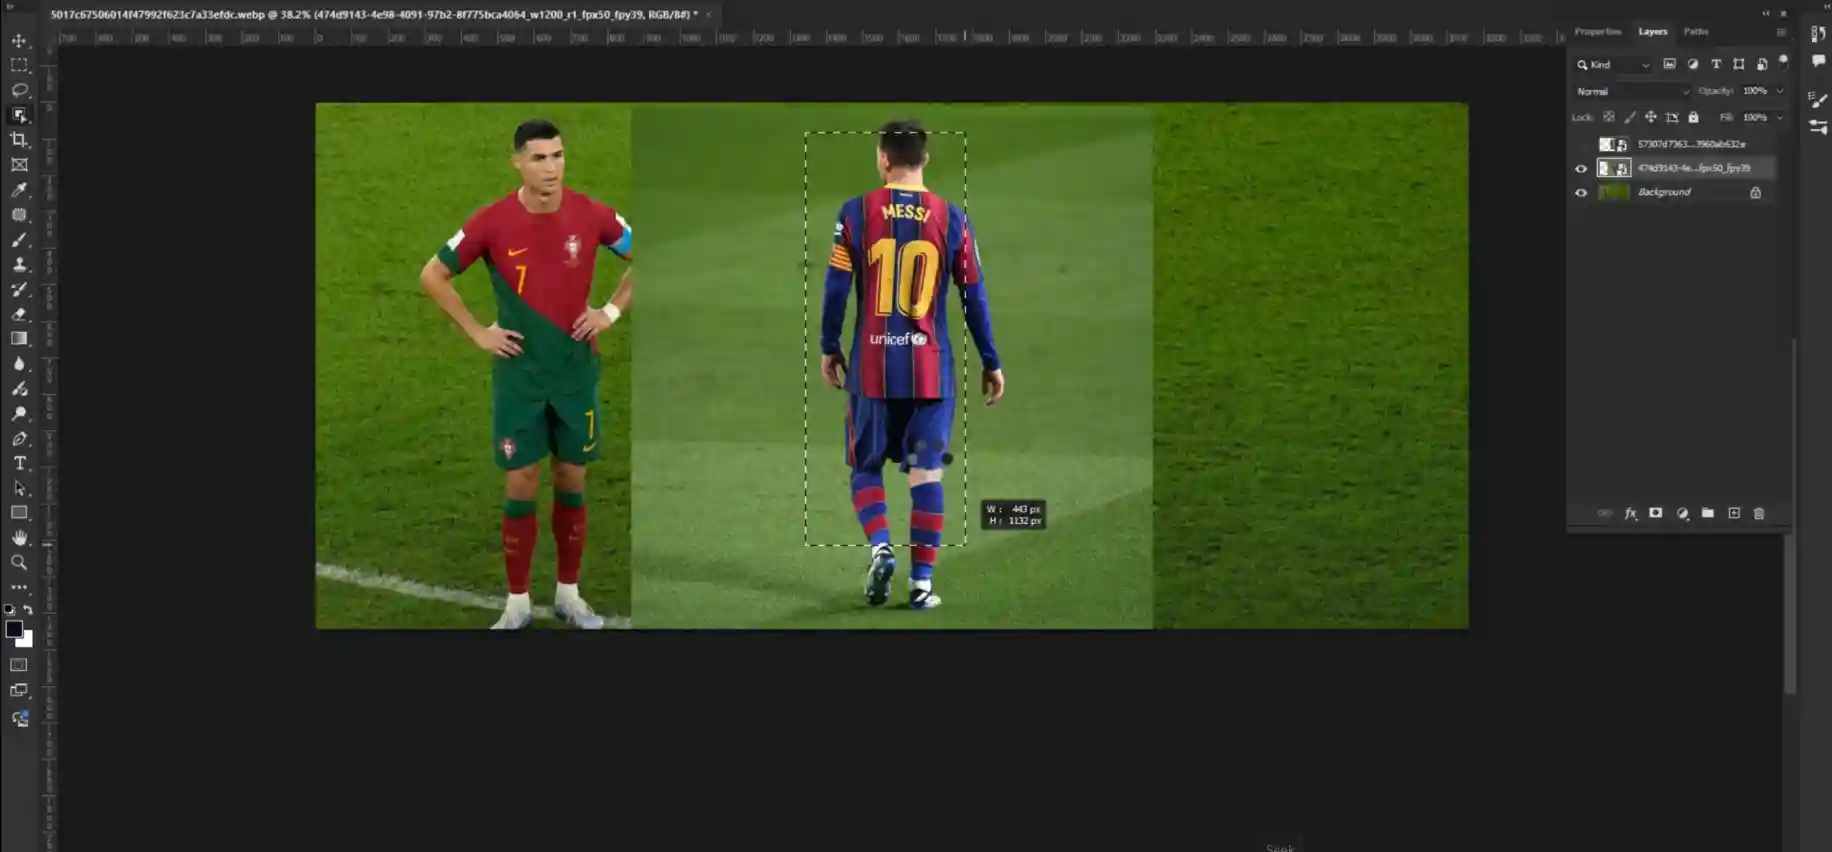
Step 05: Select Object Selection Tool
Go to your left side tool bar and select Object Selection Tool.
Step 06: Selecting The Object
Select the subject you wanted to select.
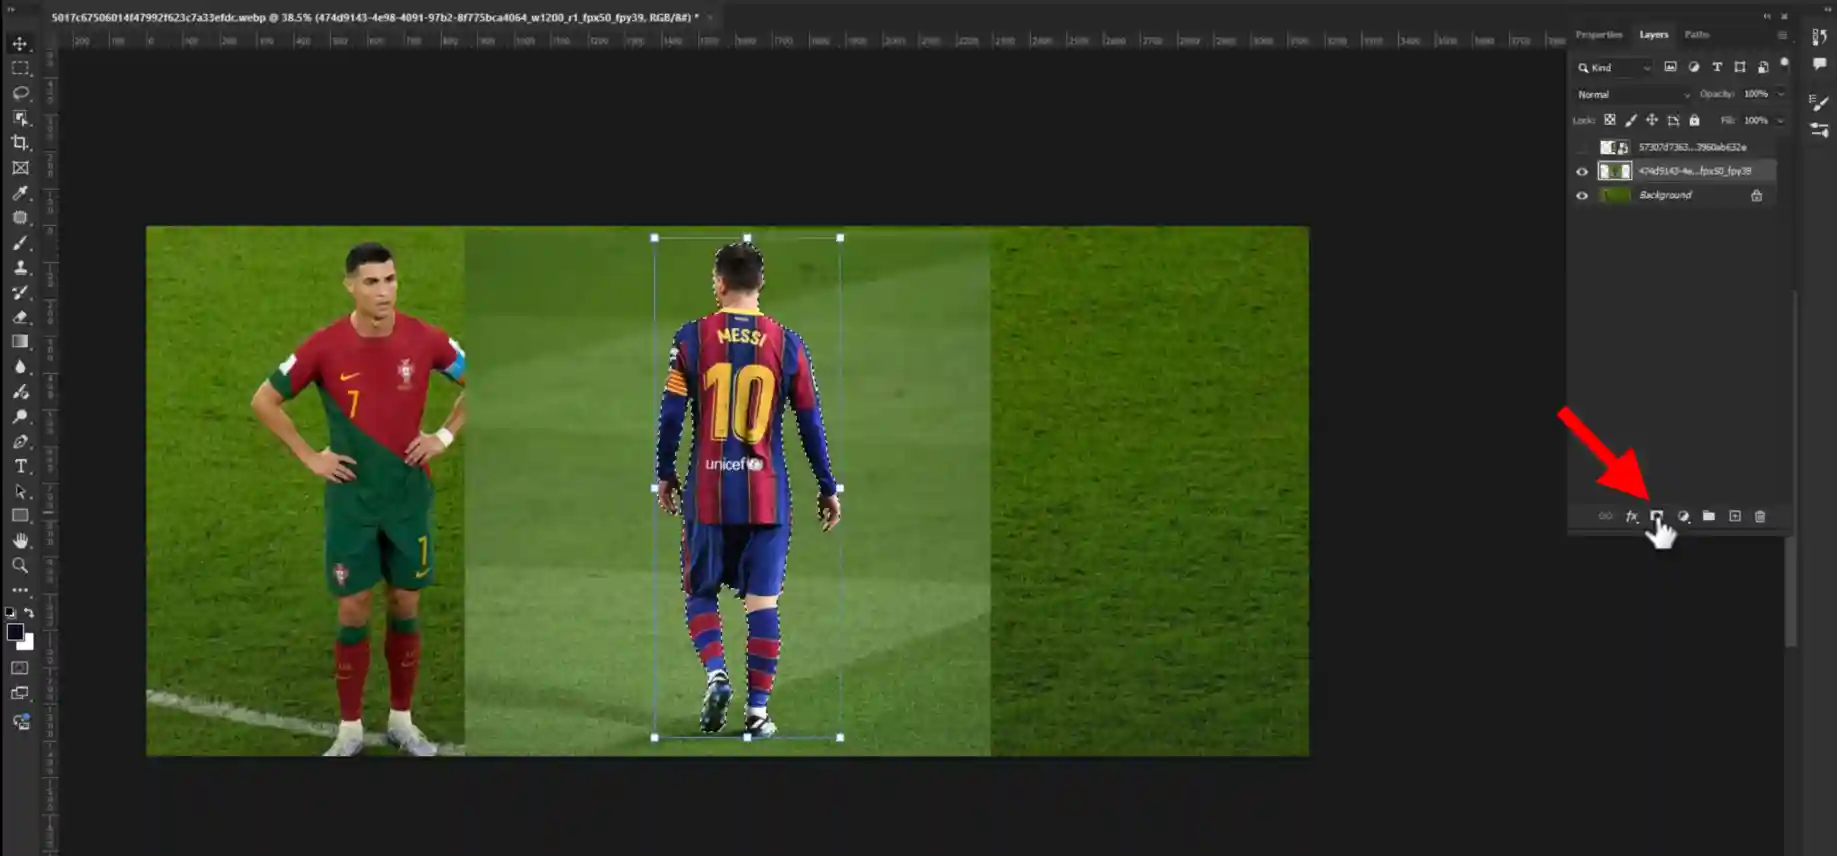
Step 07: Selecting Layer Mask Option
Go to your right side tool bar and click on layer mask option.
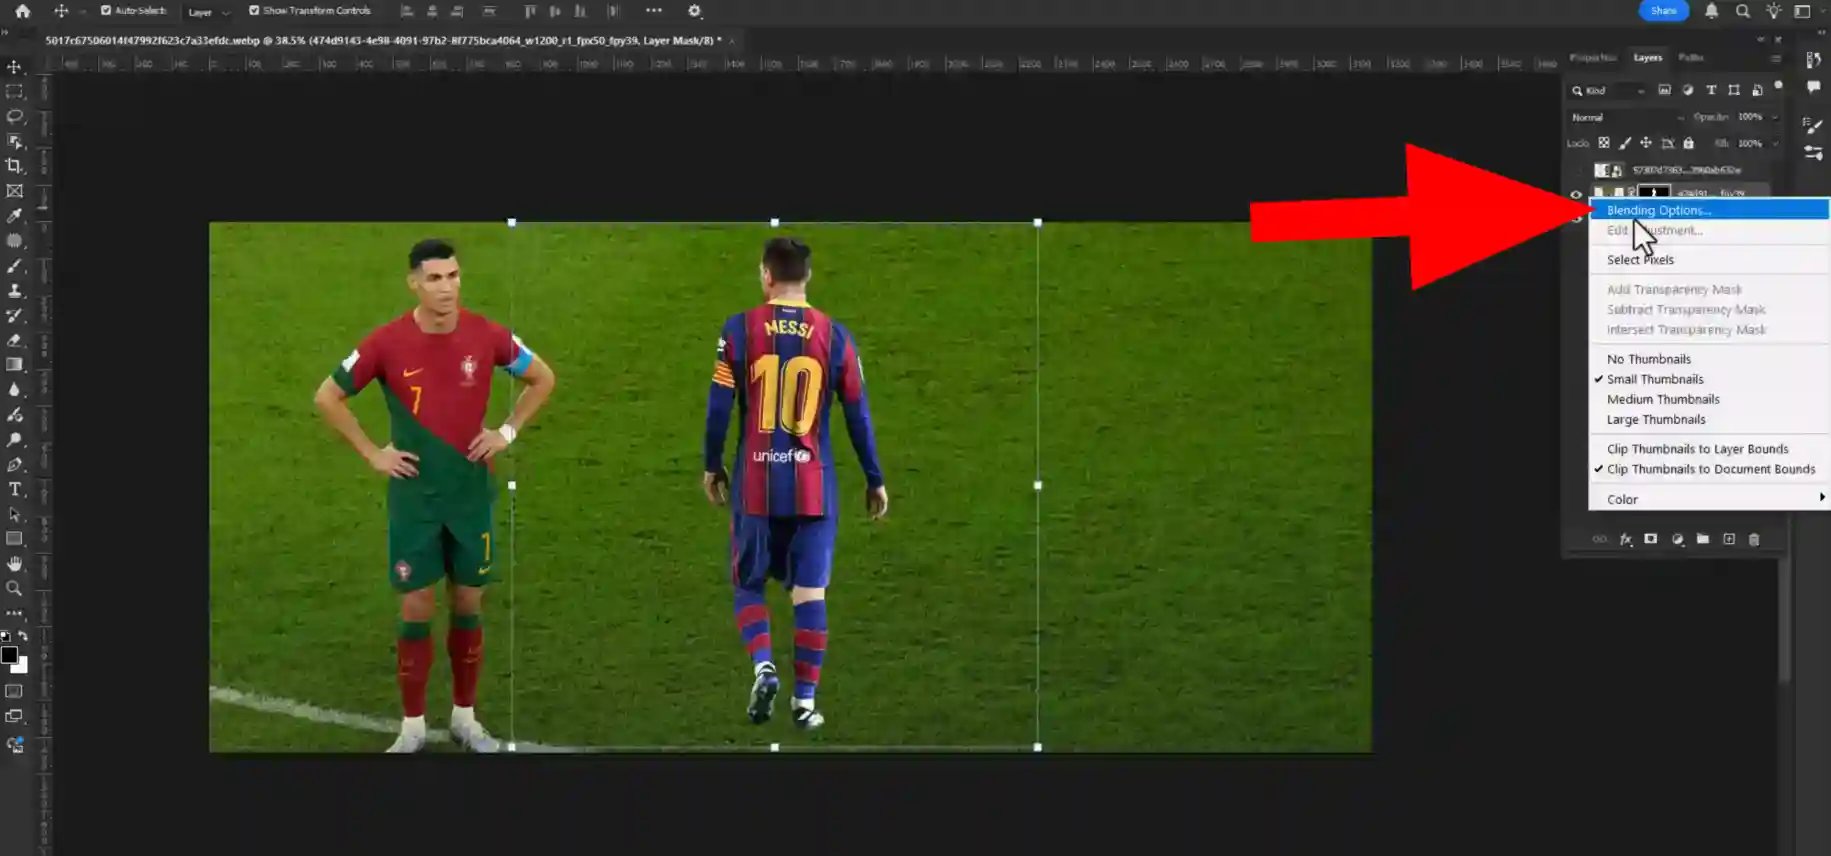
Step 08: Selecting Blending Option
Go to your right side tool bar and click on the left of the layer mask.
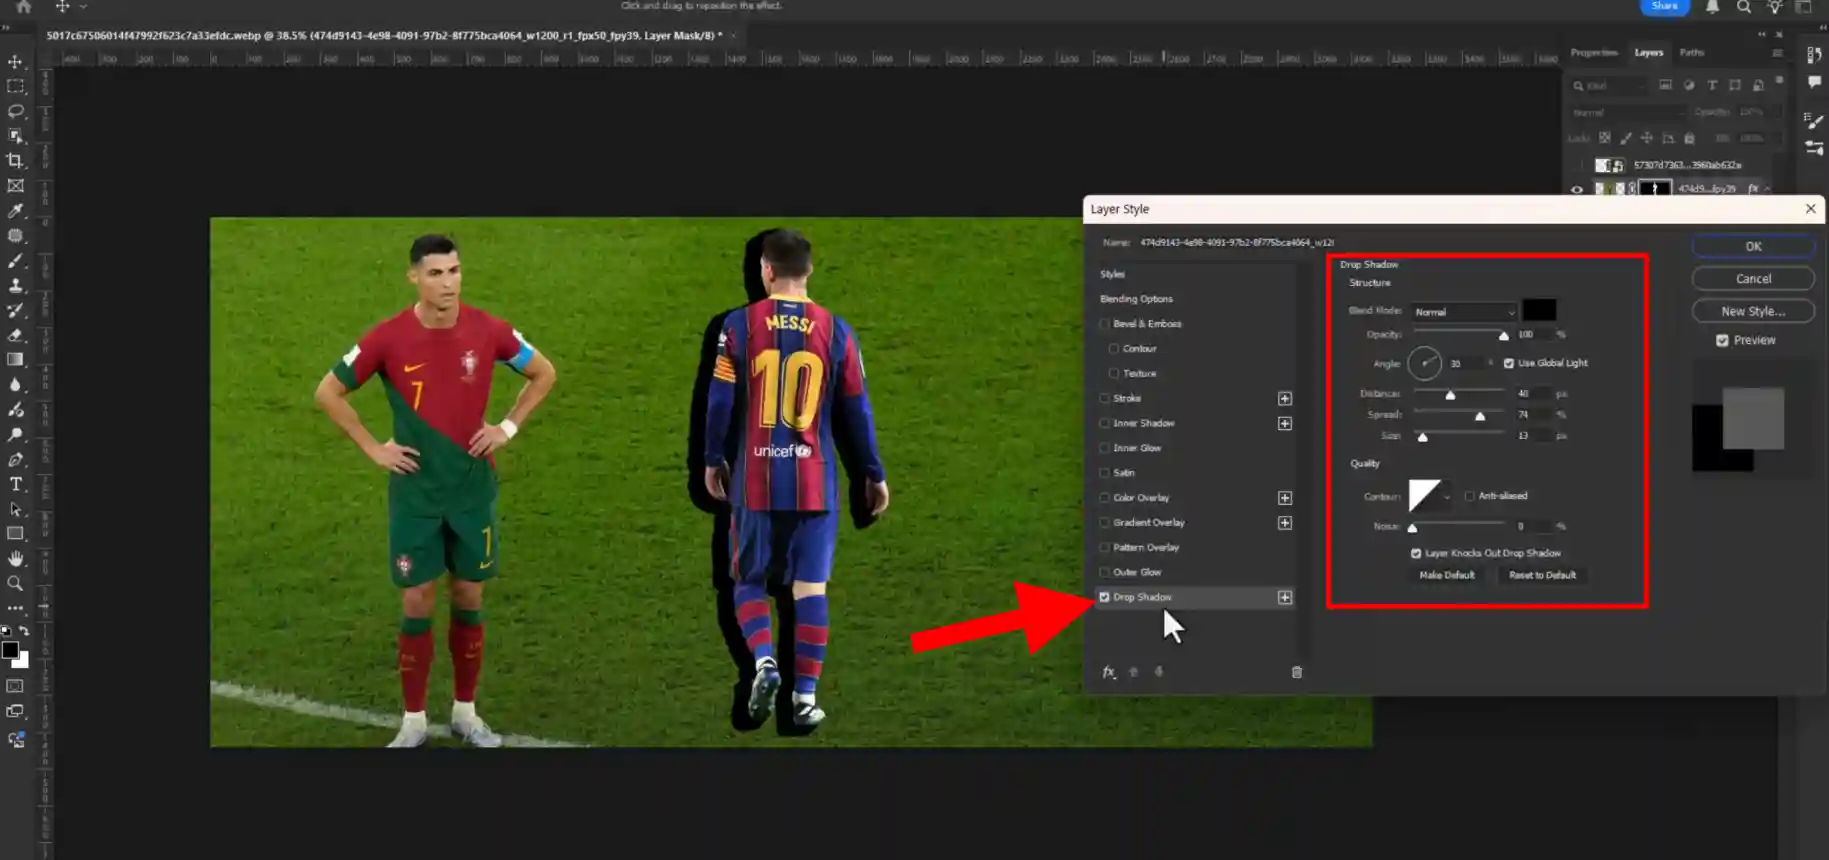
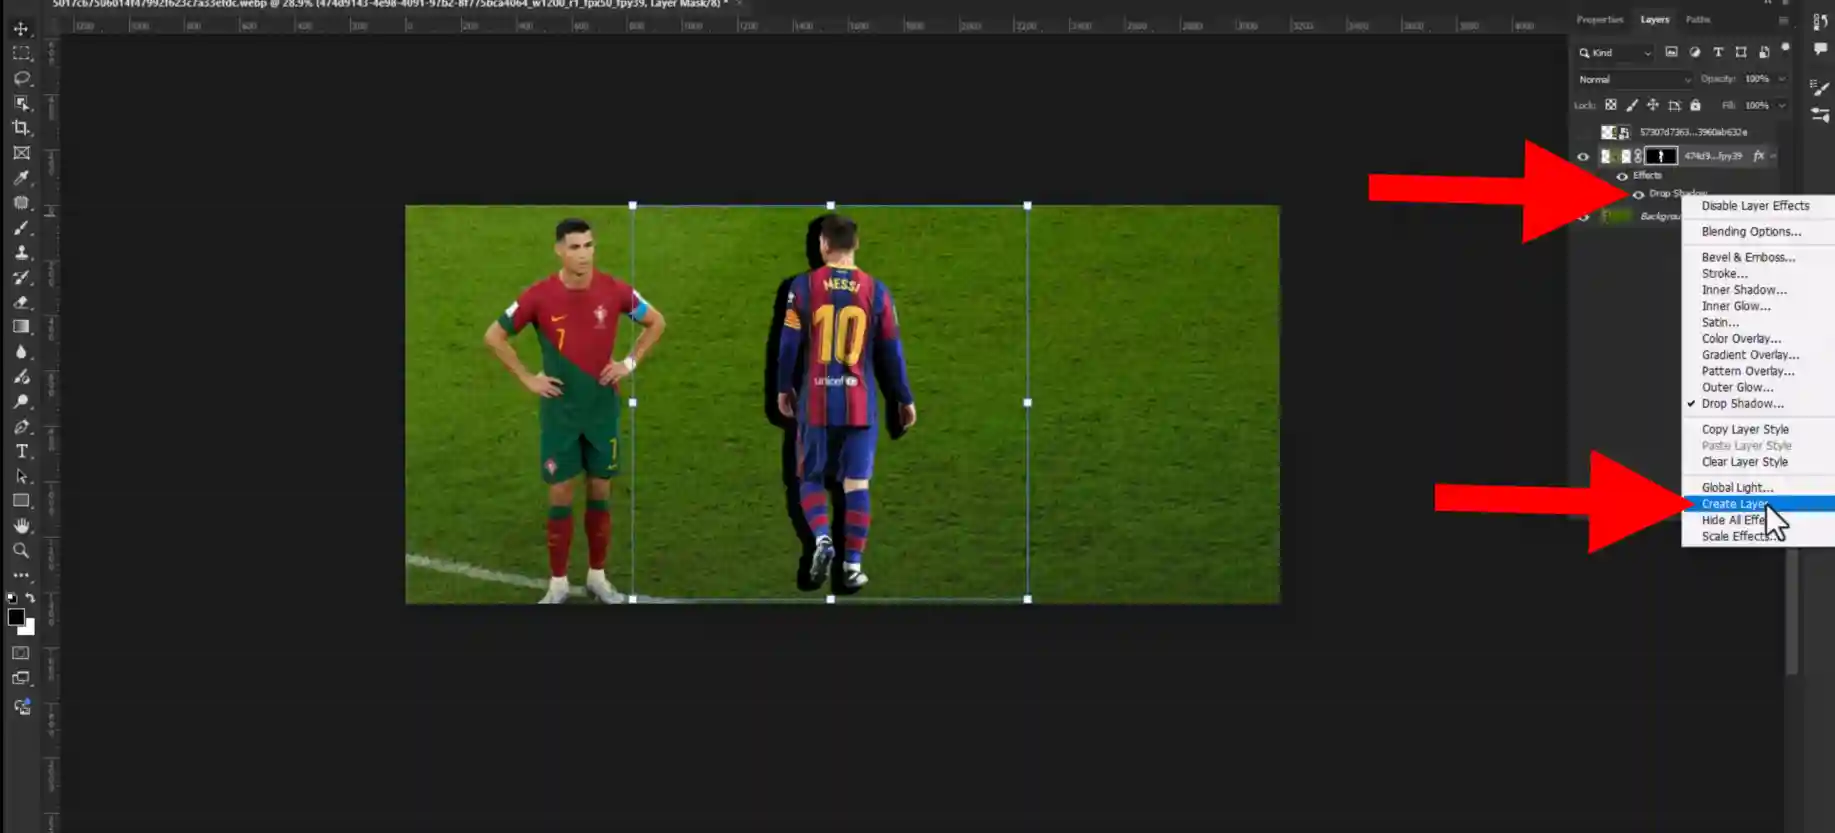
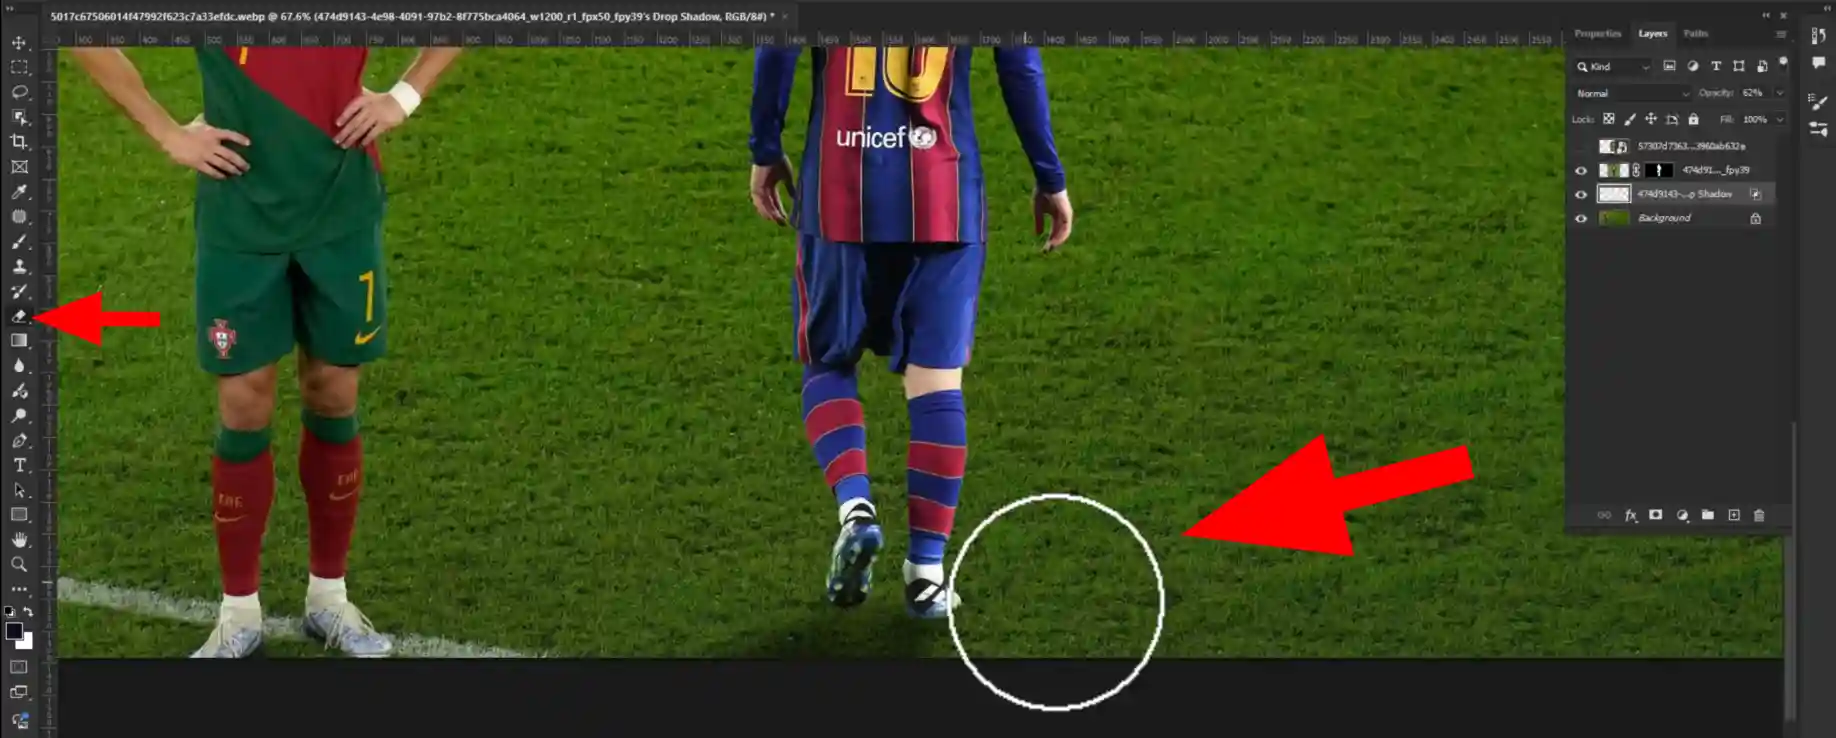
Step 09: Selecting The Drop Shadow Option
Go to Drop Shadow option and change all the amounts are given in the screenshot and press ok.
Step 10: Separating The Shadow Layer
Click on the drop shadow option then select Create Layer and press ok.
Step 11: Converting the Shadow's Shape
- First select the shadow layer.
- Now press Ctrl + T for transforming the layer.
- Now hold Ctrl and drag it from the corner and make it into the perfect shape as it is like screenshot.
Step 12: Going To Gaussian Blur
Go to Filter > Blur > Gaussian Blur.
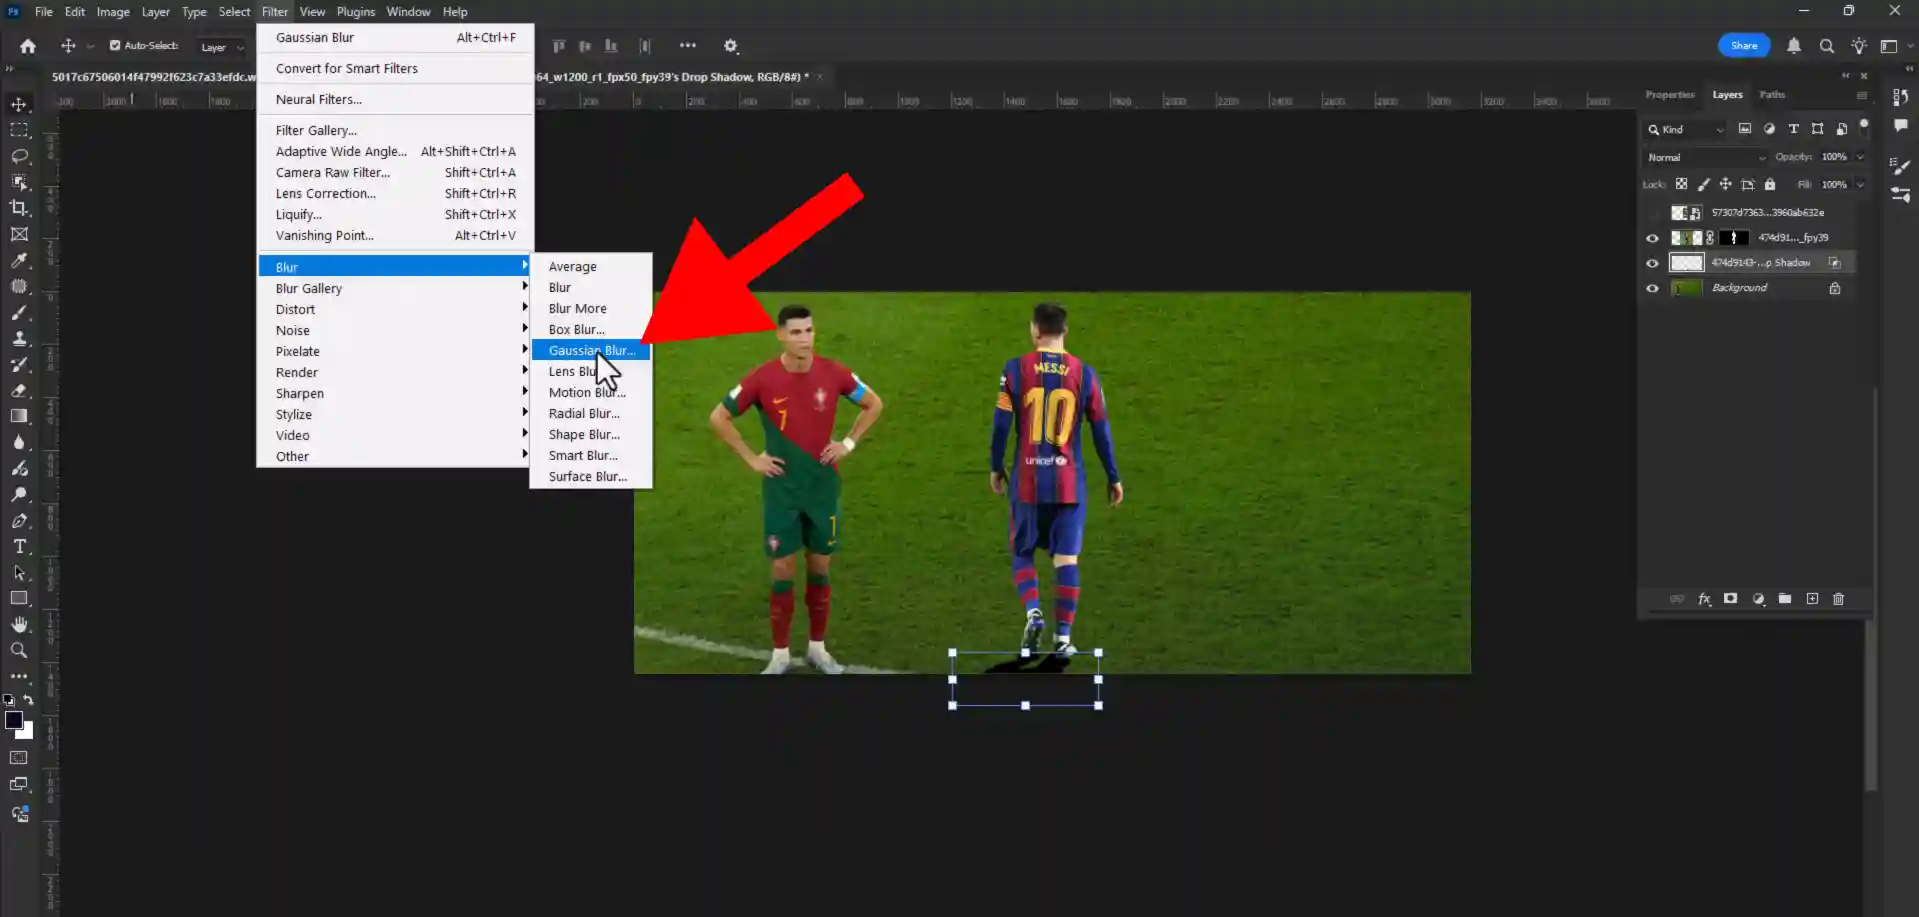
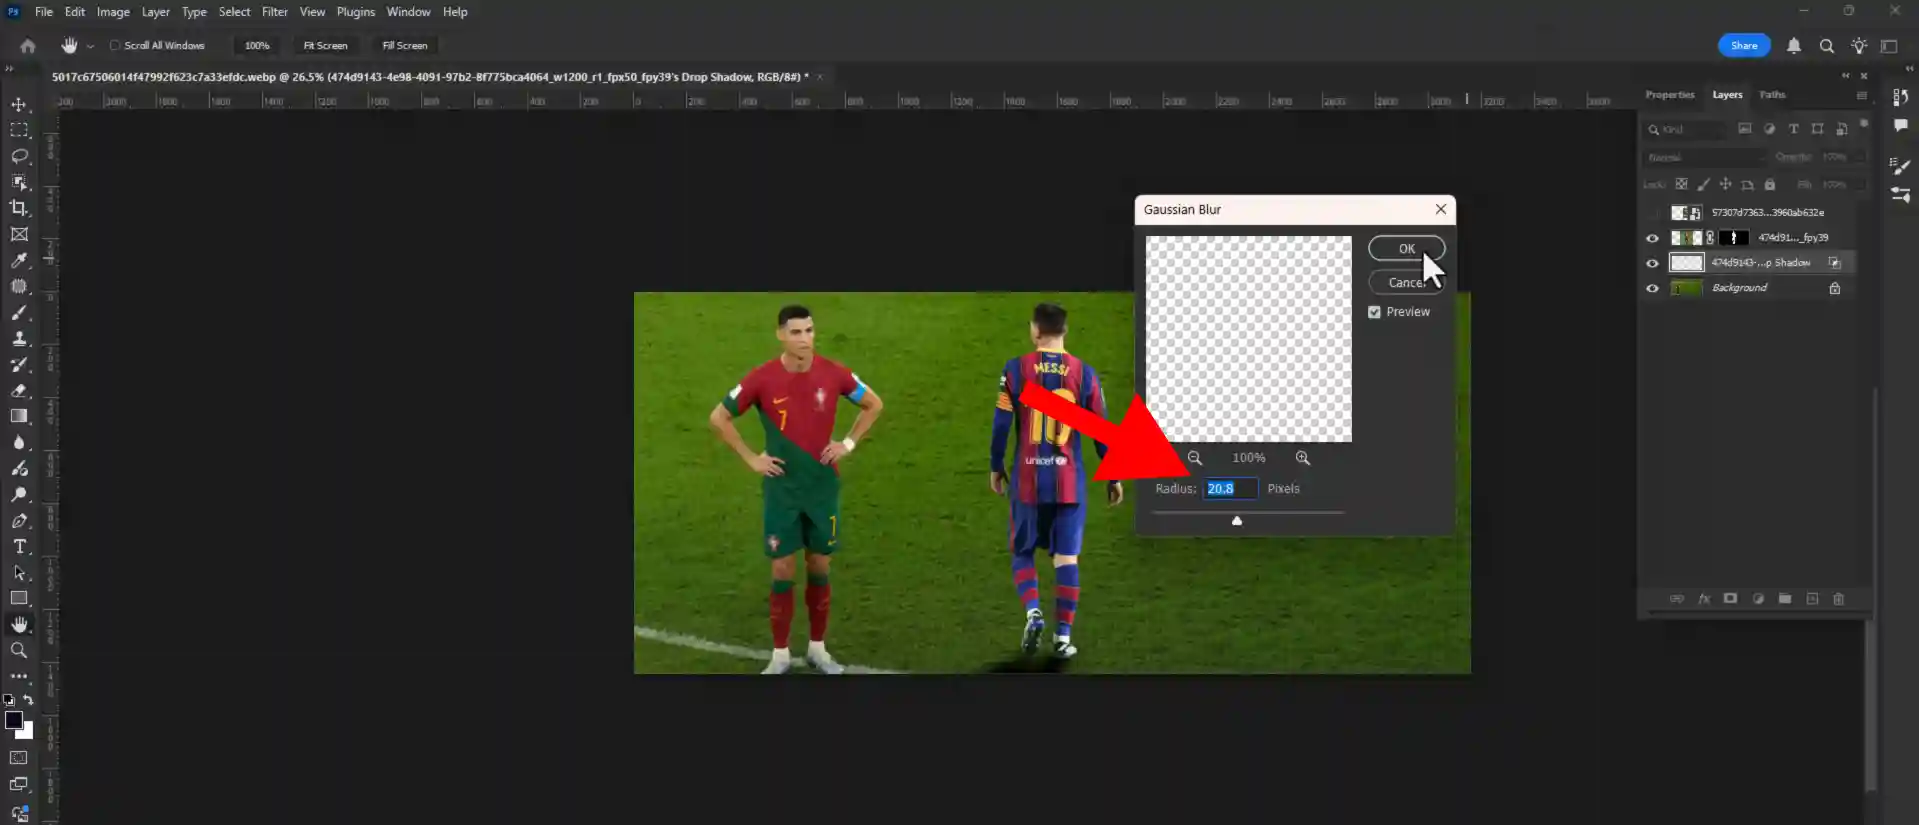
Step 13: Selecting The Amount Of Gaussian Blur
Select the Radius amount as it needed and press ok.
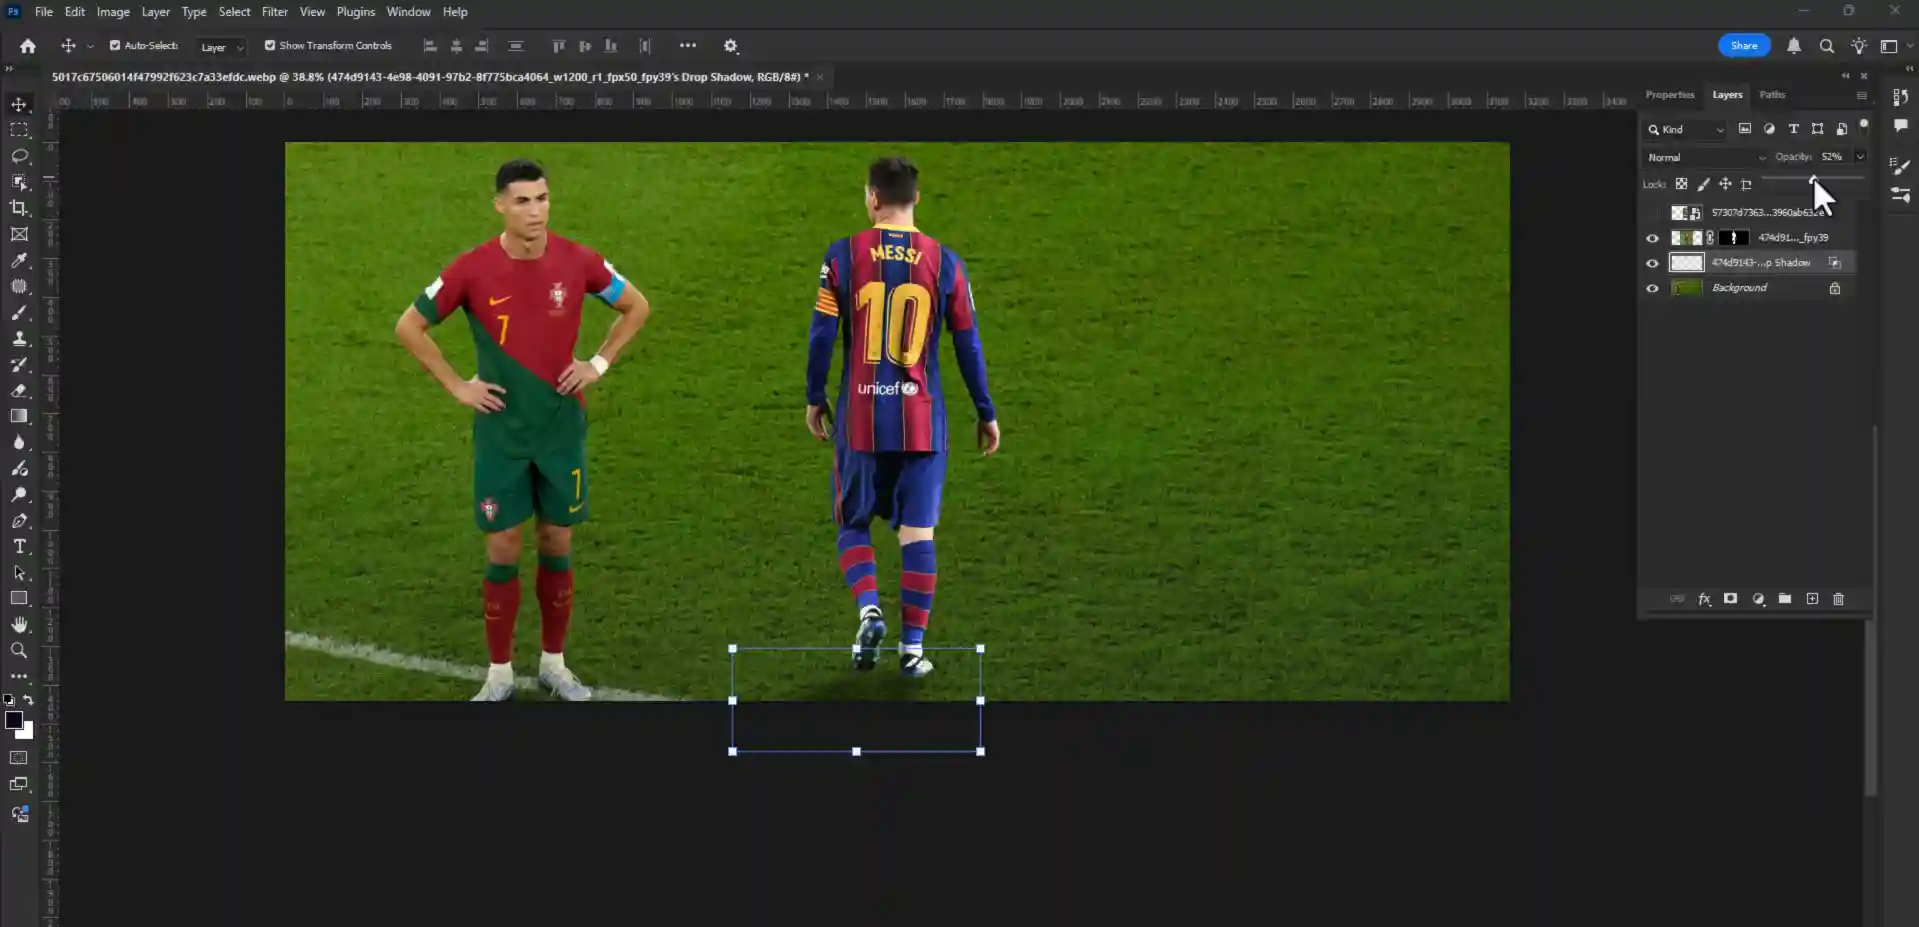
Step 14: Decreasing Opacity
Go to your left right side tool bar and decrease the opacity.
Step 15: Erasing Unwanted Area
- Press (E) to get eraser tool.
- Make sure you have to decrease the fill and opacity and hardness also as it needed.
- Now erase the unwanted area as it needed.
Step 16: Opening The Closed Layer
- Click on the eye icon for opening the layer.
- Now drag it on the right place you wanted to.
Step 17: Transforming The Layer
Press Ctrl + T and drag it from the corner and make a perfect shape of it.
Step 18: Doing The Same thing Again And Again
Now You have to do the same thing as it is like you have done to the previous layer and make it perfectly.
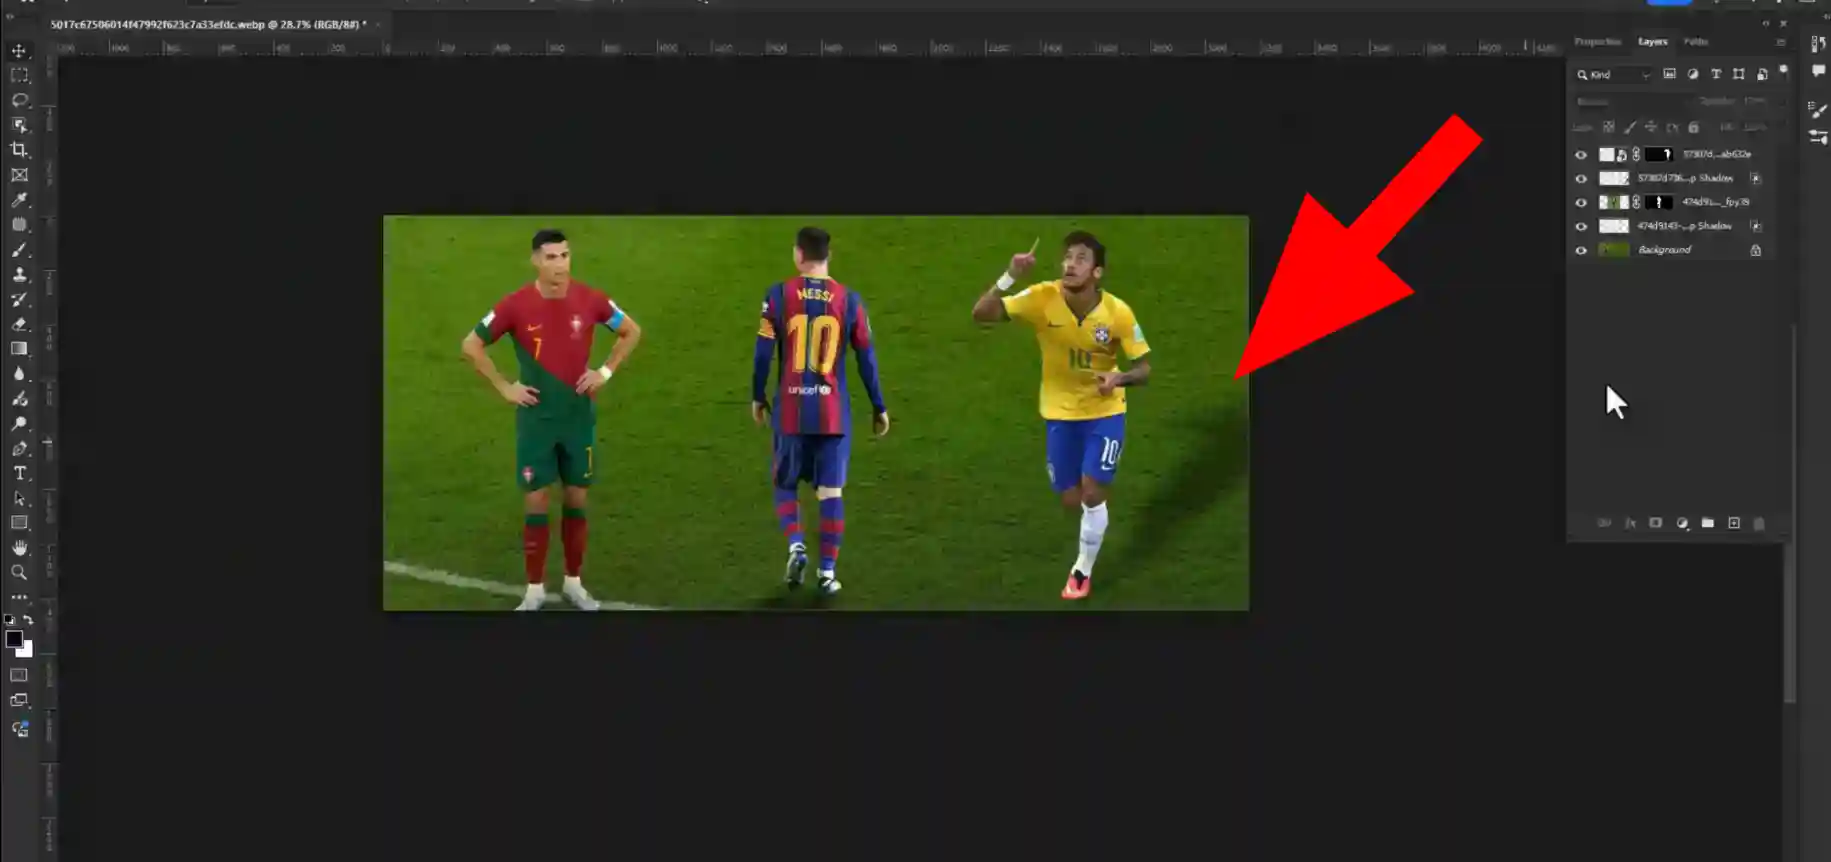
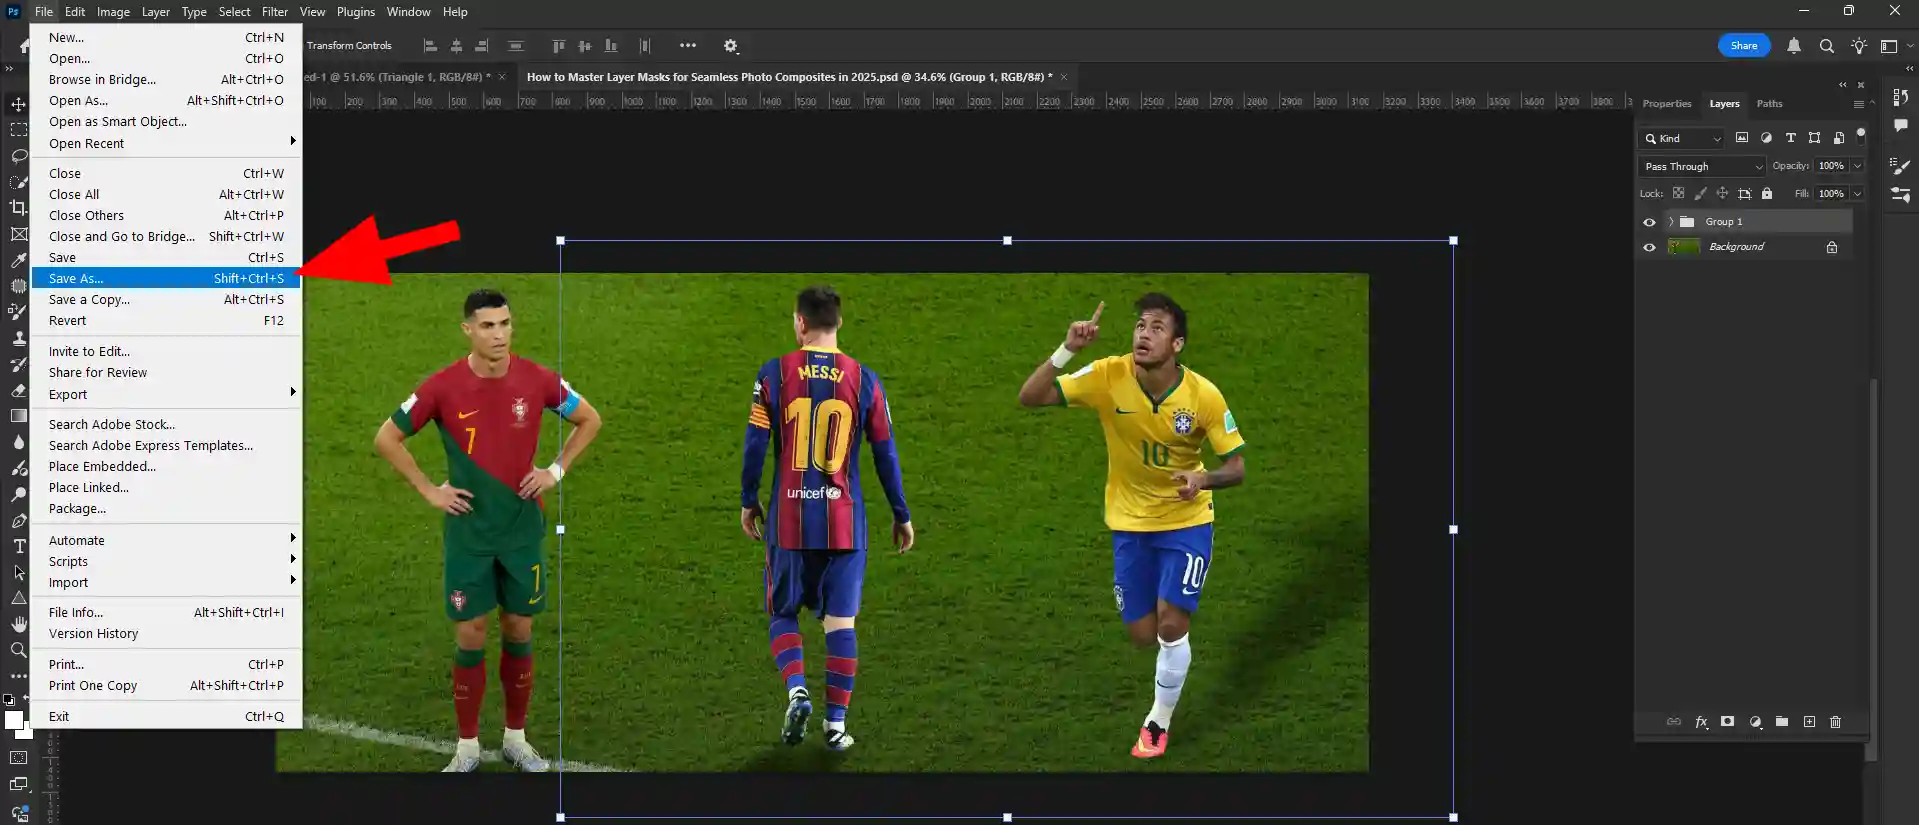
Step 19: Saving The Image
- After completing the work perfectly go to your right side and click on file option.
- Then click on save as option.
- Now save it as you wanted.You can save it JPGE,PSD format. Finally your work is done.
Watch the Tutorial in Action
Reading about techniques is one thing, but seeing them live is often the best way to learn. In this video, one of our senior editors walks you through the entire process described below, from setting up the files to creating the final seamless composite. Watch along to see these layer mask techniques in real-time before you follow the detailed steps.
;
Advanced Layer Mask Techniques for Better Composites
The steps above provide a solid foundation, but if you truly want to know how to master layer masks, you need to refine your work with these professional secrets.
- Refining Mask Edges: After creating a mask with the Object Selection Tool, you can perfect it. The "Select and Mask" workspace will appear when you double-click the mask thumbnail. Here, you can use tools like the "Refine Edge Brush" to perfectly select tricky areas like hair or fur. You can also add a slight "Feather" (e.g., 0.5 pixels) to soften the mask's edge for a better, more natural blend.
- Painting on the Mask: The real power of masks comes from painting on them manually. Select the mask thumbnail, grab a soft black brush with a low opacity (10-20%), and gently paint over hard edges to create a perfect, seamless transition. If you hide too much of your object, don't worry! Just switch your brush color to white and paint it right back in.
- Separating Drop Shadows: As shown in Step 10, separating a drop shadow into its own layer (Layer > Layer Style > Create Layer) is a critical professional technique. It gives you complete, independent control to transform, warp, and blur the shadow to match the light source and surface of your scene perfectly.
- Masking Adjustment Layers: Layer masks are not just for hiding parts of an image; they are crucial for applying targeted adjustments. When you create a Curves or Hue/Saturation adjustment layer, it comes with its own layer mask. You can then use this mask to apply your color or light adjustments to only a very specific part of your composite, which is essential for matching the light and color of different elements.
Using Gradients on Masks: For an ultra-smooth fade effect, you can apply a black-to-white gradient directly onto your layer mask. This is the professional technique for blending a new sky into the horizon or for creating a soft, misty or foggy effect that realistically covers part of an object.
Troubleshooting Common Layer Mask Problems
- Why can't I paint on my mask? This is the most common issue. Most likely, the image thumbnail for the layer is picked rather than the mask thumbnail. Make sure you click on the black and white mask thumbnail in the Layers Panel before you start painting. It will have a white border surrounding it.
- My brush is painting grey instead of pure black or white. First, press 'D' on your keyboard to reset your colors to the default black and white. If it's still not working, check the 'Mode' of your brush in the top options bar and make sure it is set to 'Normal'.
My mask edges look too hard and fake. This happens when your selection is too sharp. You can fix this by going into the "Select and Mask" workspace and increasing the "Feather" or "Smooth" sliders slightly. Alternatively, you can paint along the edge on the mask with a very large, soft-edged grey brush at a low opacity.
Need Professional Composites without the Hassle?
Mastering these skills takes time and a keen eye for detail. If you have a complex project for your business or need guaranteed, pixel-perfect results for an advertising campaign, our team is here to help. Advanced compositing techniques for advertising, e-commerce, and creative projects are our area of expertise. Let us handle the technical details so you can focus on your vision.
CONCLUSION
You have now unlocked one of the most powerful and essential skills in all of professional photo editing. With a solid grasp of layer mask compositing, you are no longer limited by a single photograph. You have the ability to blend realities, build new worlds, and present products and portraits in the most compelling way imaginable. Remember that every complex image starts with these fundamental steps. Continue to build on this knowledge, and you will find there is no limit to what you can create. The true mastery of Photoshop layer masks lies not just in following the steps, but in using them to bring your unique creative vision to life.
